第二天笔记
Android 四大组件课程概要总结
1. Activity
a. 创建
- 自动创建
- 在新建项目后,会自动为我们创建一个
MainActivity。Activity 组成部分如下:- 继承自 Activity 的类
- 放在 res/layout 文件夹的布局 XML 文件
- 在 AndroidManifest.xml 文件中声明
- 在新建项目后,会自动为我们创建一个
b. Activity 生命周期回调方法
-
Activity 生命周期方法
onCreate(): 是 - 它会在系统创建您的 Activity 时被唤起。必须在此类中调用setContentView()来定义 Activity 的布局。onStart(): 否 -onCreate完成后,Activity 将进入已启动状态,并对用户可见。此回调通常会在 Activity 进入前台与用户互动之前的最后准备工作。onResume(): 否 - 系统会在 Activity 开始与用户互动之前调用此回调。此时,Activity 位于 Activity 堆栈的顶部,并获取所有用户输入。onPause(): 否 - 当 Activity 失焦点并进入“暂停”状态时,系统会调用onPause()。onStop(): 否 - 当 Activity 对用户不可见时,系统会调用onStop()。出现这种情况的原因可能是新活动启动、现有 Activity 返回前台,或销毁旧的 Activity 正在进入它“停止”状态之前即将终止的 Activity。onRestart(): 否 - 当用户已中断的 Activity 直接重新启动时,系统会调用onRestart()。onDestroy(): 否 - 系统会在销毁 Activity 之前调用此回调。Activity 被销毁的最后一个回调onDestroy()是 Activity 进行清理工作和释放所有资源的最后机会。
-
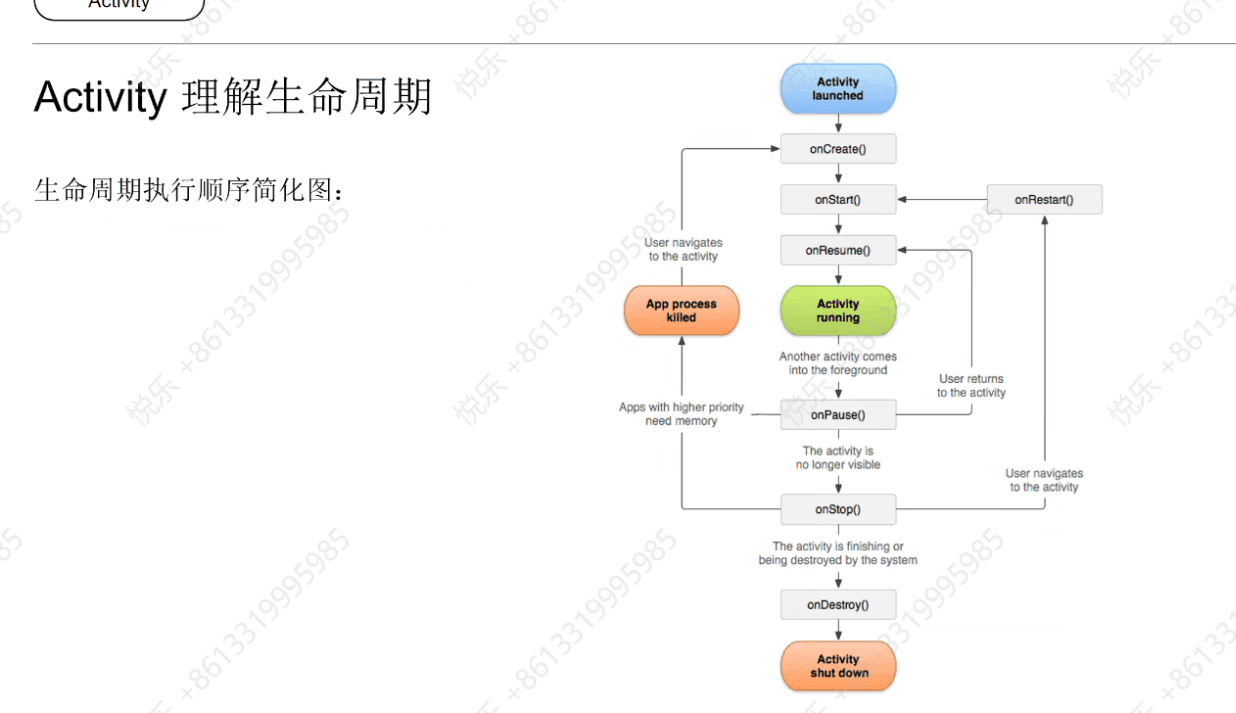
Activity 理解生命周期
- 通过生命周期执行顺序简化图了解生命周期的各个阶段。
c. Activity 的四种启动方式
i. 通过如下命令查看详细的 Activity 任务栈信息:adb shell dumpsys activity activities
这份总结涵盖了 Activity 的创建、生命周期方法及其理解、以及启动方式的概述。希望这些内容对您的学习有帮助!
AB页面跳转:
// 普通样式
A.onPause
B.onCreate
B.onStart
B.onResume
A.stop

// B是透明或者dialog样式
A.onPause
B.onCreate
B.onStart
B.onResume

// B页面关闭重新回到A页面
B.onPause
A.onRestart
A.onStart
A.onResume
B.onStop
B.onDestroy
启动模式与避坑指南笔记
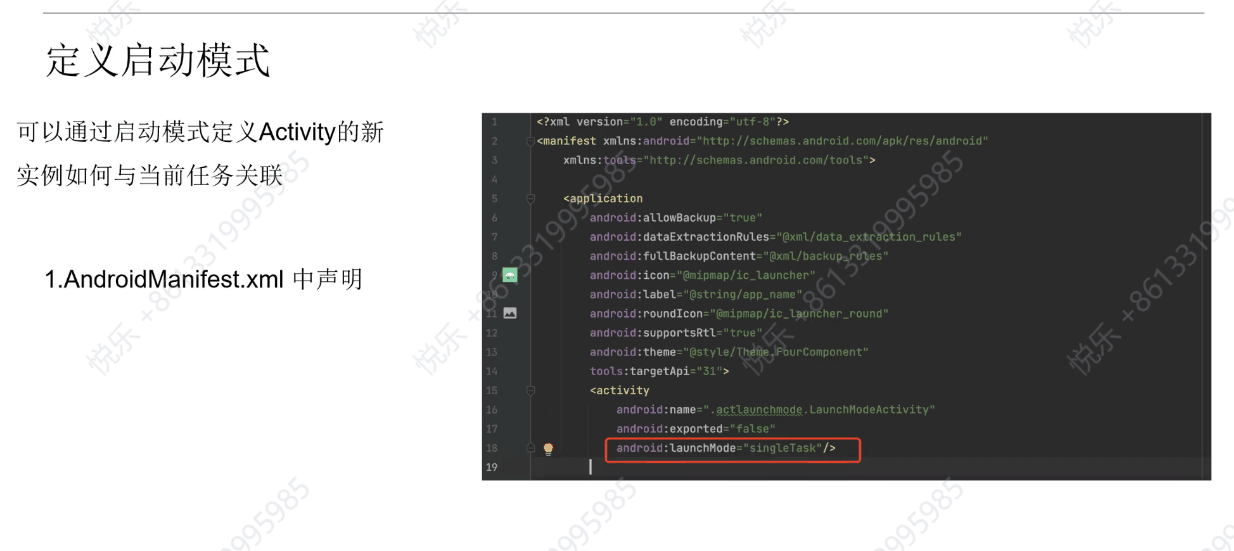
定义启动模式
可以通过启动模式定义Activity的新实例如何与当前任务关联:
-
AndroidManifest.xml中声明<activity android:name=".YourActivity" android:launchMode="singleTask" />
启动模式介绍
| 属性值 | 对应 flags | 描述 |
|---|---|---|
standard |
– | 默认模式。系统在启动Activity的任务中创建新实例,并将intent传递给该实例。每个实例可以属于不同的任务。 |
singleTop |
FLAG_ACTIVITY_SINGLE_TOP |
如果当前任务的顶部已有该Activity实例,系统调用onNewIntent()方法传递intent给该实例,而不是创建新实例。 |
singleTask |
FLAG_ACTIVITY_NEW_TASK |
系统会创建新任务,并实例化新的Activity。如果任务中已有该Activity实例,则调用onNewIntent()方法传递intent,而不是创建新实例。 |
singleInstance |
– | 与singleTask相似,唯一不同是该模式下的Activity在启动时会独占一个任务栈,且不会与其他Activity共享。 |
- standard : 不管怎样都会新建activity
- singleTop:如果目标在任务栈的栈顶,那么直接复用实例,触发目标activity的onNewIntent方法, 如果目标任务不在任务栈的栈顶,那么新建一个目标实例,添加到任务栈
- singleTask:如果任务栈内没有目标实例,则直接创建新的目标实例到任务栈,如果有,则直接把目标activity上面所有的activity都移出栈,把目标activity置于栈顶。
- singleInstance:
设置singleInstance
在 Android 中,如果你希望一个 Activity 采用 singleInstance 启动模式,需要在 AndroidManifest.xml 文件中为该 Activity 设置相应的 launchMode 属性。此外,你还可以通过 Intent 设置 Flags 来控制 Activity 的启动行为。
在 AndroidManifest.xml 中设置 singleInstance
在 AndroidManifest.xml 文件中为目标 Activity 添加 launchMode 属性,并将其值设置为 singleInstance:
<activity
    android:name=".YourActivity"
    android:launchMode="singleInstance">
</activity>
通过 Intent 设置 Flags
当你启动一个 Activity 时,可以通过设置 Intent Flags 来影响 Activity 的启动行为。常见的 Flags 包括:
FLAG_ACTIVITY_NEW_TASK: 如果 Activity 不存在于当前任务中,将启动一个新的任务并将 Activity 放置在该任务的根上。FLAG_ACTIVITY_CLEAR_TOP: 如果 Activity 已存在于任务中,将清除其上的所有 Activity,并将其置于顶部。
下面是一个示例代码,展示了如何使用 Intent 启动 singleInstance 模式的 Activity 并设置 Flags:
Intent intent = new Intent(this, YourActivity.class);
intent.setFlags(Intent.FLAG_ACTIVITY_NEW_TASK | Intent.FLAG_ACTIVITY_CLEAR_TOP);
startActivity(intent);
结合使用 singleInstance 和 Intent Flags
结合上述方法,确保在 AndroidManifest.xml 中正确配置 singleInstance 模式,并在启动 Activity 时设置合适的 Flags。以下是一个完整的示例:
1. 在 AndroidManifest.xml 中配置:
<activity
    android:name=".YourActivity"
    android:launchMode="singleInstance">
</activity>
2. 在代码中启动 Activity 并设置 Flags:
Intent intent = new Intent(this, YourActivity.class);
intent.setFlags(Intent.FLAG_ACTIVITY_NEW_TASK | Intent.FLAG_ACTIVITY_CLEAR_TOP);
startActivity(intent);
通过这种方式,你可以确保目标 Activity 以 singleInstance 模式启动,并根据需要设置相应的 Flags 来控制其启动行为。
Intent两种启动方式
- 显式 Intent
- 隐式 Intent
Activity 避坑指南
- 资源回收:在Activity的生命周期结束时,确保释放资源、取消网络请求、注销监听器等操作,以防止内存泄漏。
- 内存泄漏:避免在Activity中引用长生命周期对象,使用弱引用或在适当的生命周期方法中释放资源。
- Context 使用:谨慎使用Context,避免持有Activity的引用,以免引发内存泄漏。尽量使用Application的Context。
- 生命周期管理:理解Activity的生命周期并正确地管理资源。确保在
onPause、onStop、onDestroy等生命周期方法中释放资源和取消注册监听器。 - 横竖屏切换:当横竖屏切换时,Activity会销毁并重新创建。确保在这个过程中保存和恢复必要的状态信息,以防止用户体验的中断。
Activity-Service两种启动方式及关键方法回调(start bind)
Service创建
Service的创建包括两部分:
- 新建类需要继承
Service - 在
AndroidManifest.xml文件中进行声明
示例代码:
<service
    android:name=".service.FirstService"
    android:enabled="true"
    android:exported="true">
</service>
启动和停止服务
| 方法 | 描述 |
|---|---|
startService() |
启动服务 |
startForegroundService() |
启动前台服务 |
stopService()、stopSelf() |
停止服务 |
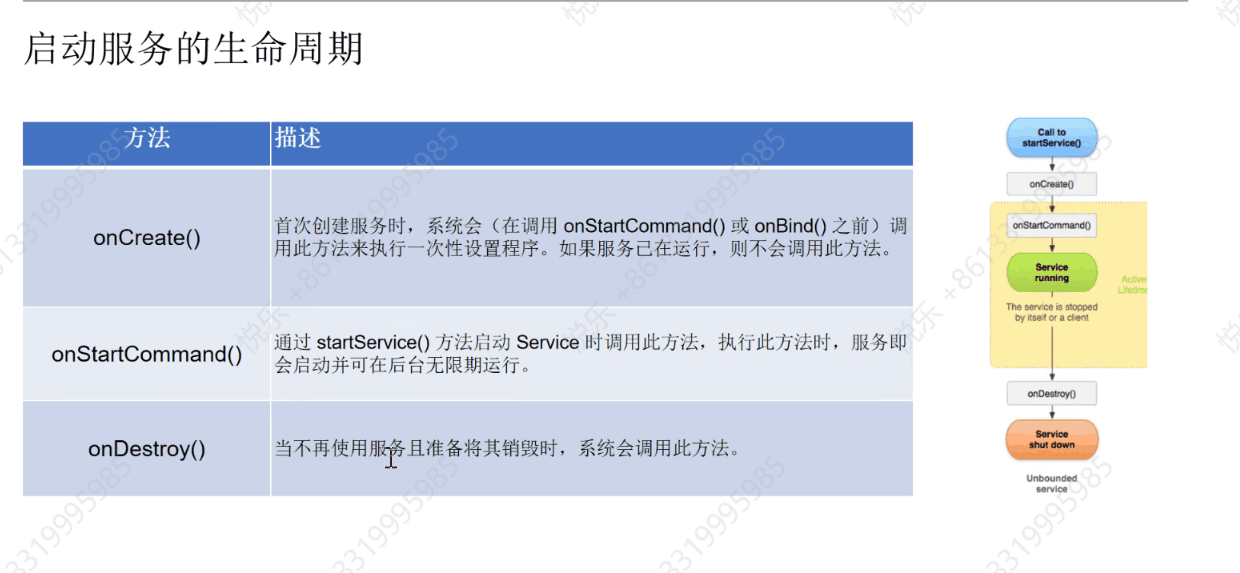
启动服务的生命周期
| 方法 | 描述 |
|---|---|
onCreate() |
首次创建服务时,系统会(在调用 onStartCommand() 或 onBind() 之前)调用此方法来执行一次性设置程序。如果服务已在运行,则不会调用此方法。 |
onStartCommand() |
通过 startService() 方法启动 Service 时调用此方法,执行此方法时,服务即会启动并可在后台无限期运行。 |
onDestroy() |
当不再使用服务且准备销毁时,系统会调用此方法。 |
服务生命周期示意图
Call to startService()
    ↓
onCreate()
    ↓
onStartCommand()
    ↓
Service running
    ↓
onDestroy()
    ↓
Service shut down
Service的启动与绑定
一、启动和停止服务
Service创建
-
新建类继承
Service -
在
AndroidManifest.xml文件中声明<service android:name=".service.FirstService" android:enabled="true" android:exported="true"> </service>
启动和停止服务方法

| 方法 | 描述 |
|---|---|
startService() |
启动服务 |
startForegroundService() |
启动前台服务 |
stopService()、stopSelf() |
停止服务 |
启动服务的生命周期
| 方法 | 描述 |
|---|---|
onCreate() |
首次创建服务时调用,用于一次性设置程序。如果服务已在运行,则不会调用此方法。 |
onStartCommand() |
通过 startService() 方法启动 Service 时调用此方法。 |
onDestroy() |
服务不再使用且准备销毁时调用。 |
服务生命周期示意图
Call to startService()
    ↓
onCreate()
    ↓
onStartCommand()
    ↓
Service running
    ↓
onDestroy()
    ↓
Service shut down
二、绑定和解绑服务
绑定和解绑方法
| 方法 | 描述 |
|---|---|
bindService() |
绑定服务 |
unbindService() |
解绑服务 |
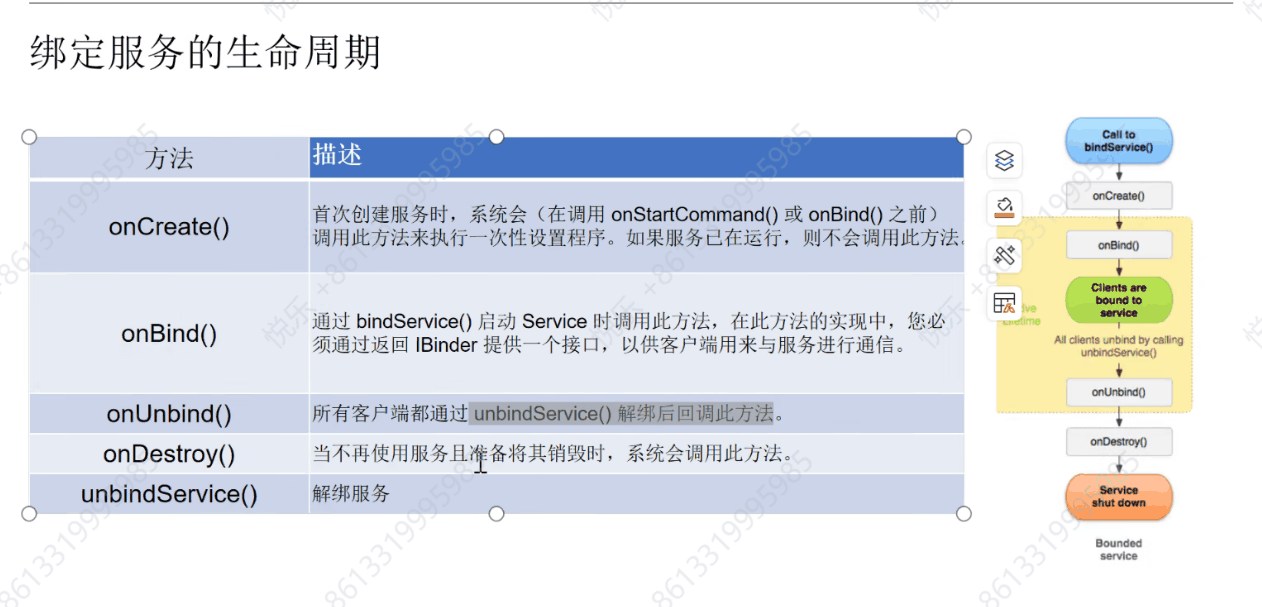
绑定服务的生命周期
| 方法 | 描述 |
|---|---|
onCreate() |
首次创建服务时系统调用(在调用 onStartCommand() 或 onBind() 之前)。 |
onBind() |
通过 bindService() 启动 Service 时调用,返回 IBinder 接口供客户端与服务通信。 |
onUnbind() |
所有客户端通过 unbindService() 解绑时调用。 |
onDestroy() |
服务不再使用且准备销毁时系统调用。 |
unbindService() |
解绑服务。 |
绑定服务生命周期示意图
Call to bindService()
    ↓
onCreate()
    ↓
onBind()
    ↓
Clients are bound to service
    ↓
All clients unbind by calling unbindService()
    ↓
onUnbind()
    ↓
onDestroy()
    ↓
Service shut down
三、其他概念
广播
- 实现方式:使用
IntentService代码实现。 - 广播回调:两种实现方式。

ContentProvider
- 理解原理:掌握
ContentProvider的工作机制和使用方法。
跨进程实现方式
- Messenger 和 AIDL:使用
Messenger和AIDL实现跨进程通信。
总结
activity:
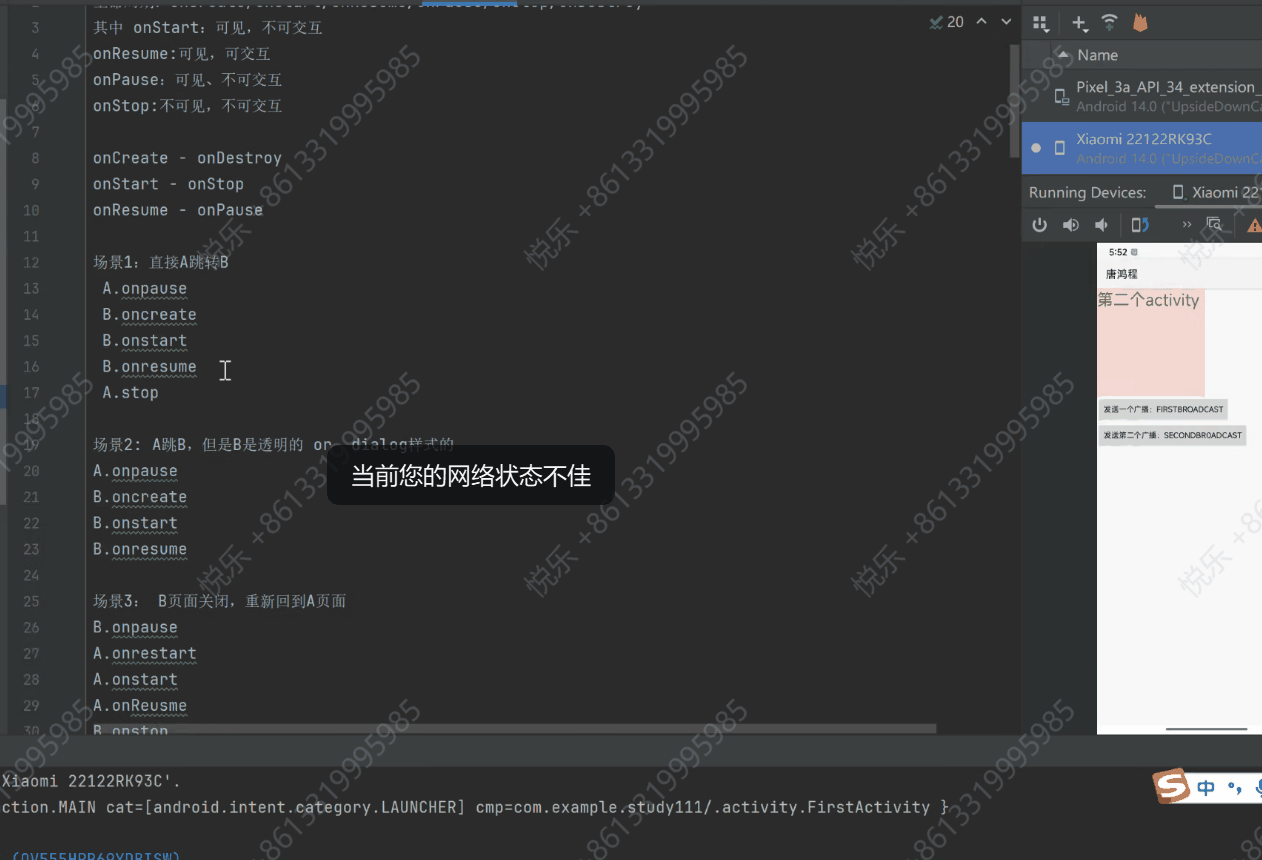
生命周期:onCreate/onStart/onResume/onPause/onStop/onDestroy
其中 onStart:可见,不可交互
onResume:可见,可交互
onPause:可见、不可交互
onStop:不可见,不可交互
onCreate - onDestroy
onStart - onStop
onResume - onPause
场景1:直接A跳转B
A.onpause
B.oncreate
B.onstart
B.onresume
A.stop
场景2: A跳B,但是B是透明的 or dialog样式的
A.onpause
B.oncreate
B.onstart
B.onresume
场景3: B页面关闭,重新回到A页面
B.onpause
A.onrestart
A.onstart
A.onReusme
B.onstop
B.ondestroy
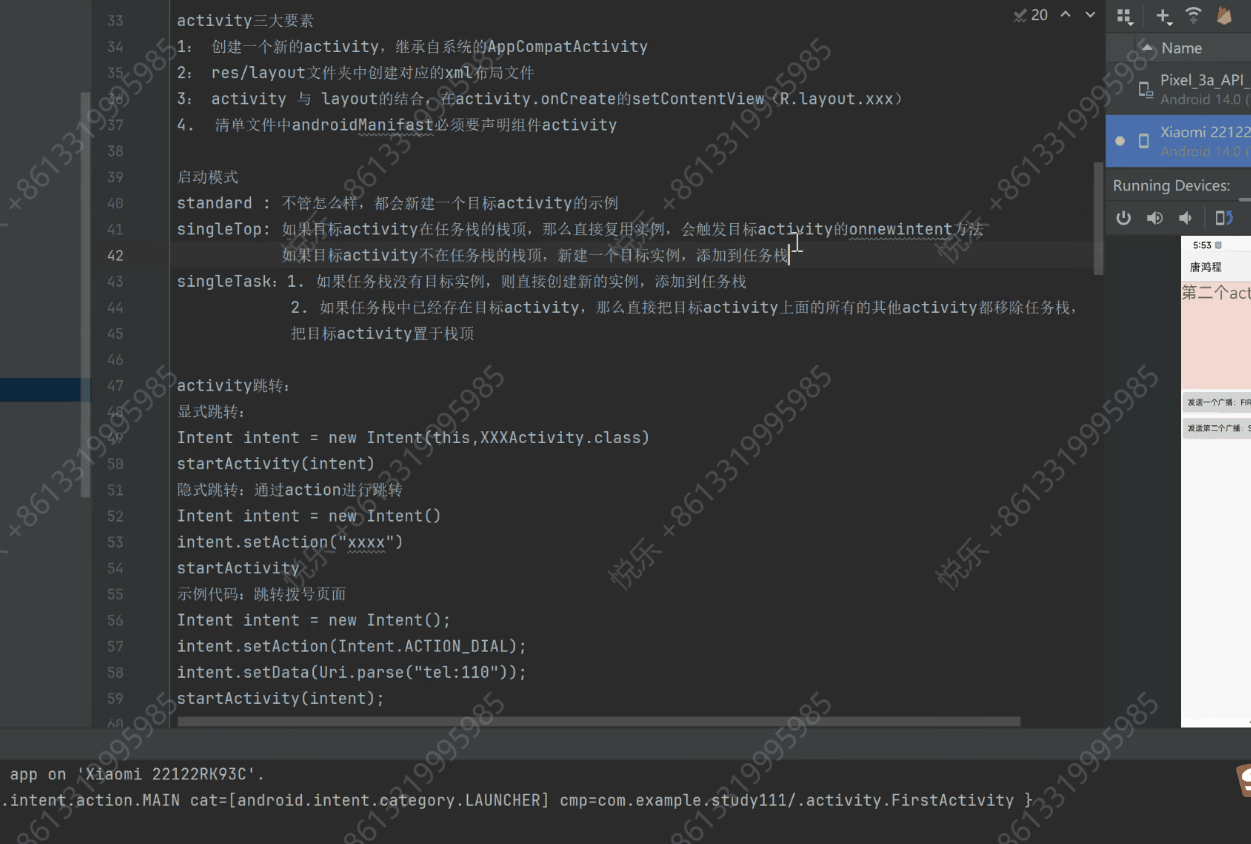
activity三大要素
1: 创建一个新的activity,继承自系统的AppCompatActivity
2: res/layout文件夹中创建对应的xml布局文件
3: activity 与 layout的结合,在activity.onCreate的setContentView(R.layout.xxx)
4. 清单文件中androidManifast必须要声明组件activity
启动模式
standard : 不管怎么样,都会新建一个目标activity的示例
singleTop: 如果目标activity在任务栈的栈顶,那么直接复用实例,会触发目标activity的onnewintent方法
如果目标activity不在任务栈的栈顶,新建一个目标实例,添加到任务栈
singleTask:1. 如果任务栈没有目标实例,则直接创建新的实例,添加到任务栈
2. 如果任务栈中已经存在目标activity,那么直接把目标activity上面的所有的其他activity都移除任务栈,
把目标activity置于栈顶
activity跳转:
显式跳转:
Intent intent = new Intent(this,XXXActivity.class)
startActivity(intent)
隐式跳转:通过action进行跳转
Intent intent = new Intent()
intent.setAction("xxxx")
startActivity
示例代码:跳转拨号页面
Intent intent = new Intent();
intent.setAction(Intent.ACTION_DIAL);
intent.setData(Uri.parse("tel:110"));
startActivity(intent);
intent:组件之间消息传递的媒介,同时我们可以用它启动各个组件(activity、service)
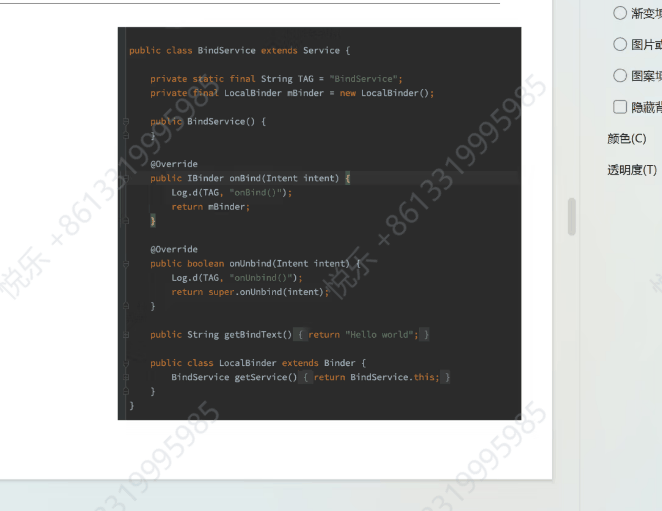
Service创建流程
1. 继承系统Service,实现抽象方法 onBind
2. 清单文件中注册组件
示例:
<service android:name=".service.MyService"
android:exported="true"
android:enabled="true"/>
Service启动模式:
1. startService(new Intent(this,xxxService.class))
触发生命周期:onCreate、onStartCommand,如果service已经创建了,则不会再次触发onCreate
2. stopService、stopSelf
触发生命周期:onDestroy
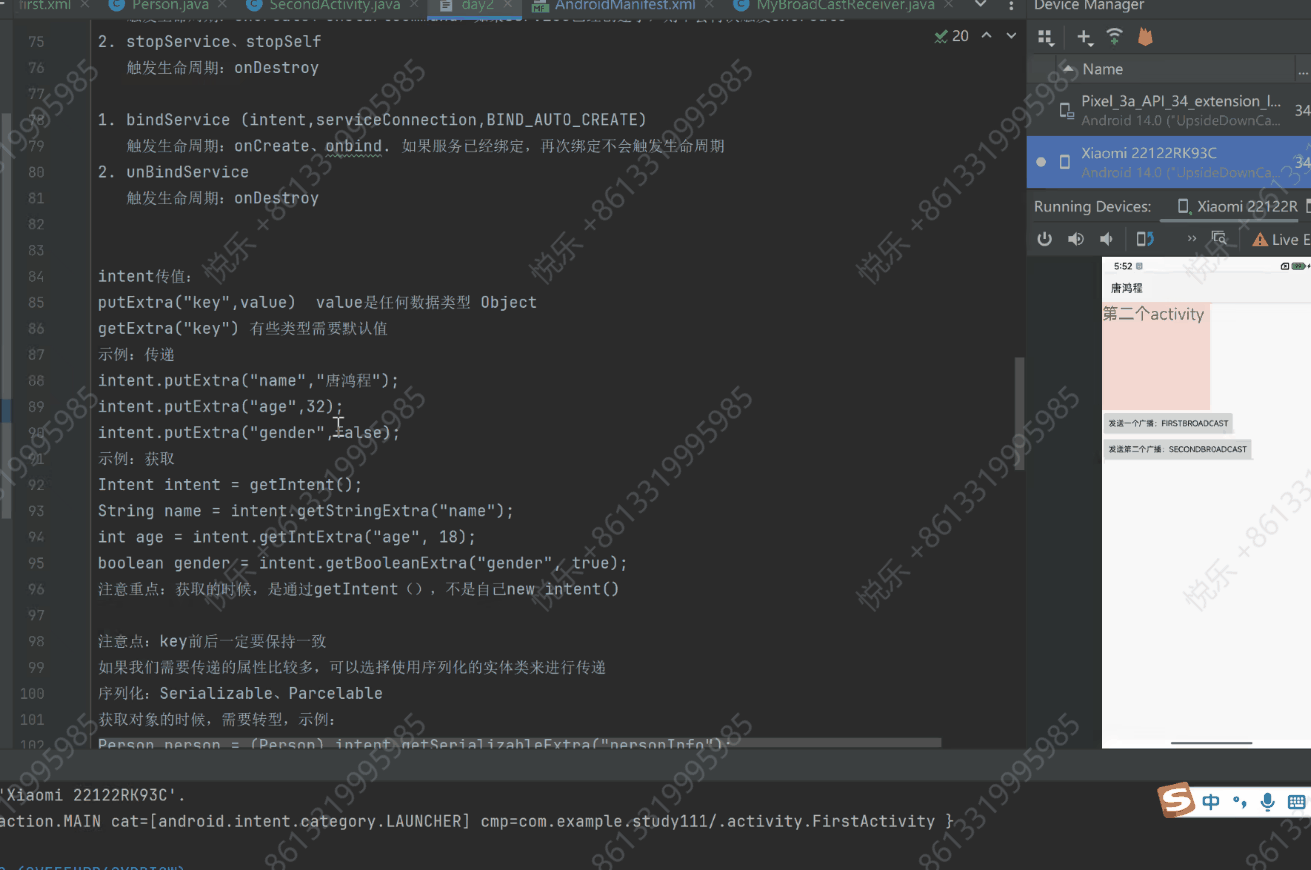
1. bindService (intent,serviceConnection,BIND_AUTO_CREATE)
触发生命周期:onCreate、onbind. 如果服务已经绑定,再次绑定不会触发生命周期
2. unBindService
触发生命周期:onDestroy
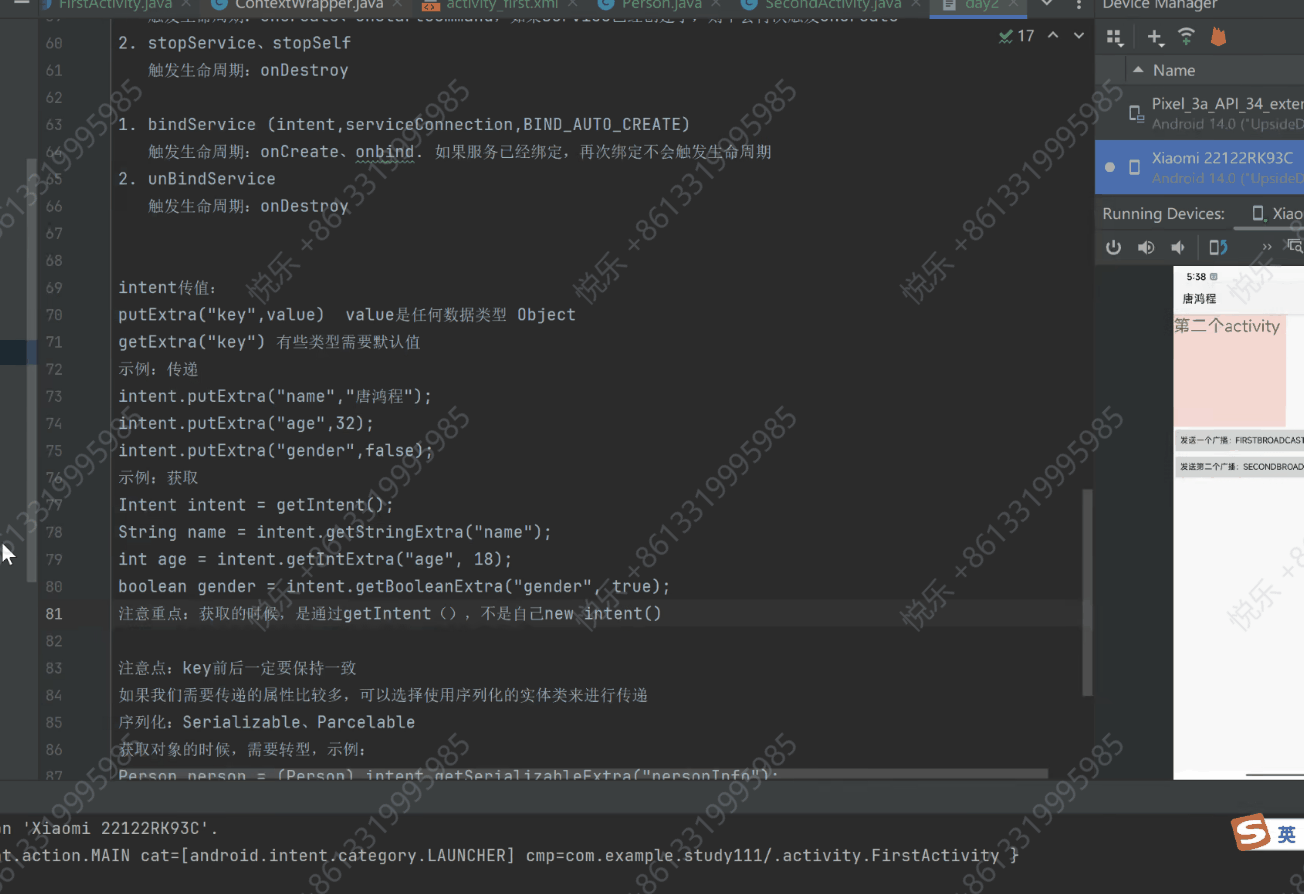
intent传值:
putExtra("key",value) value是任何数据类型 Object
getExtra("key") 有些类型需要默认值
示例:传递
intent.putExtra("name","唐鸿程");
intent.putExtra("age",32);
intent.putExtra("gender",false);
示例:获取
Intent intent = getIntent();
String name = intent.getStringExtra("name");
int age = intent.getIntExtra("age", 18);
boolean gender = intent.getBooleanExtra("gender", true);
注意重点:获取的时候,是通过getIntent(),不是自己new intent()
注意点:key前后一定要保持一致
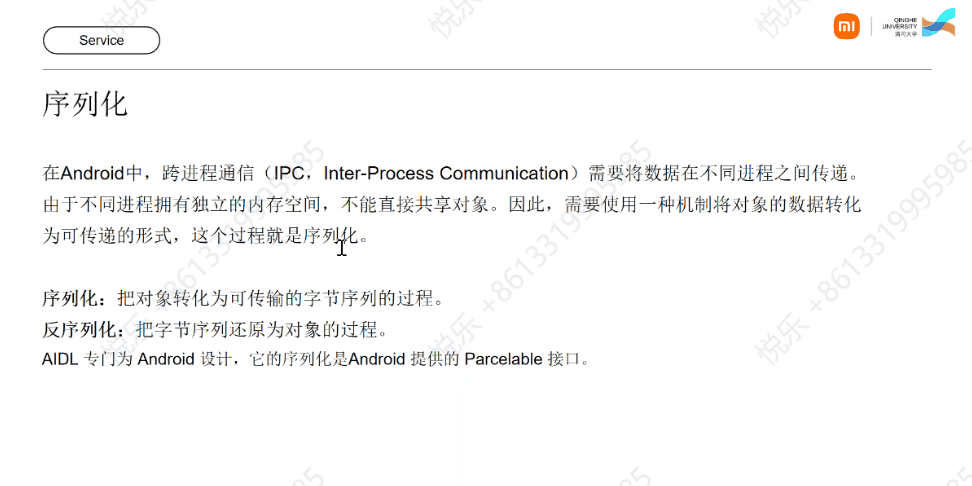
如果我们需要传递的属性比较多,可以选择使用序列化的实体类来进行传递
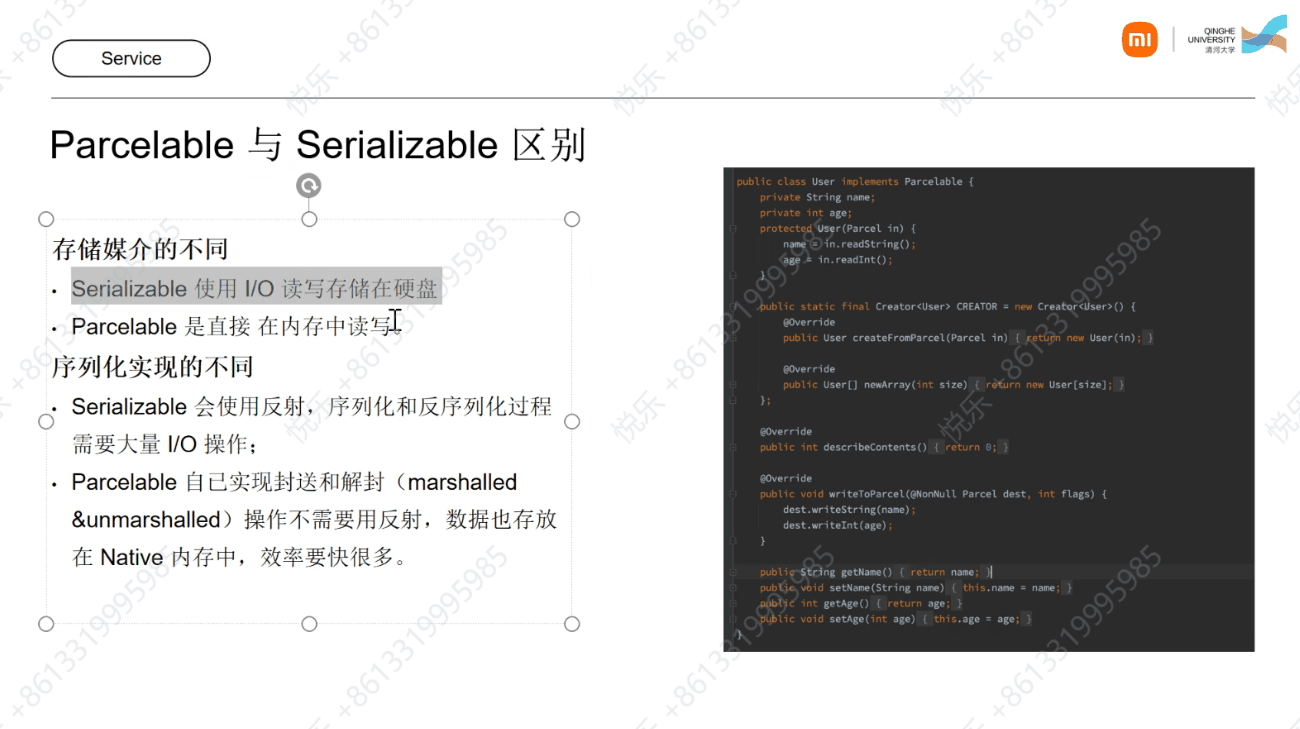
序列化:Serializable、Parcelable
获取对象的时候,需要转型,示例:
Person person = (Person) intent.getSerializableExtra("personInfo");
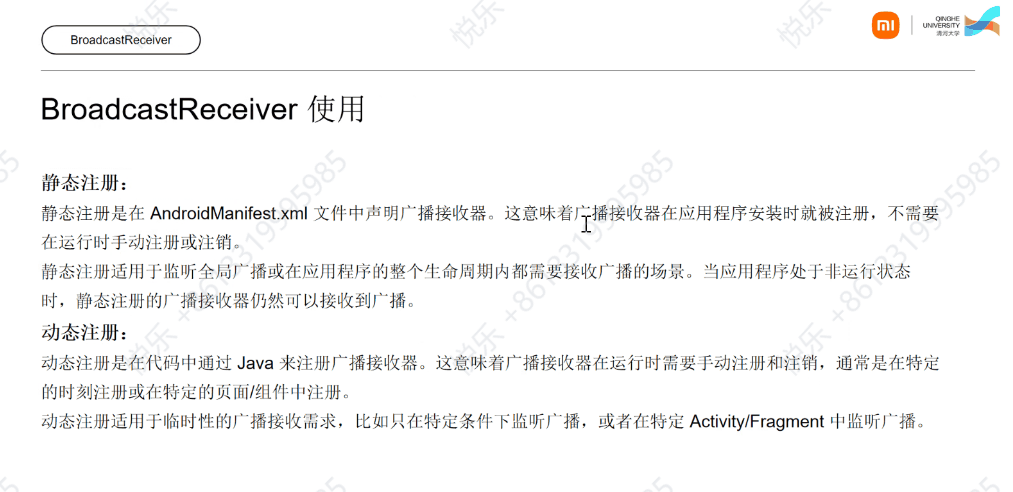
broadcastreceiver
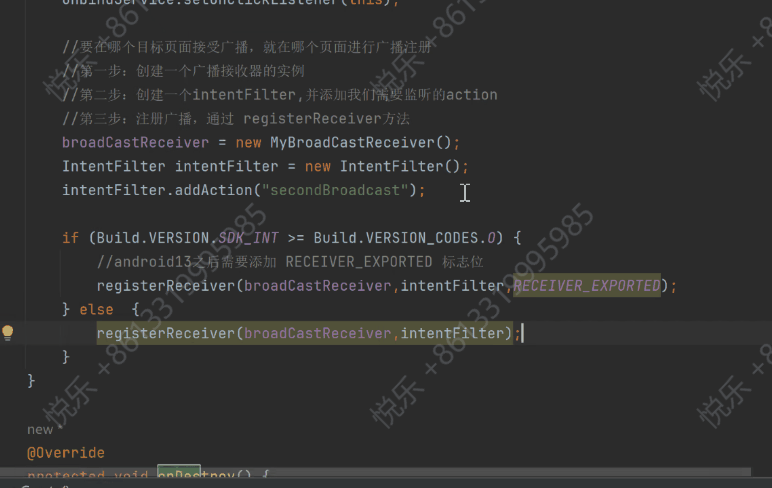
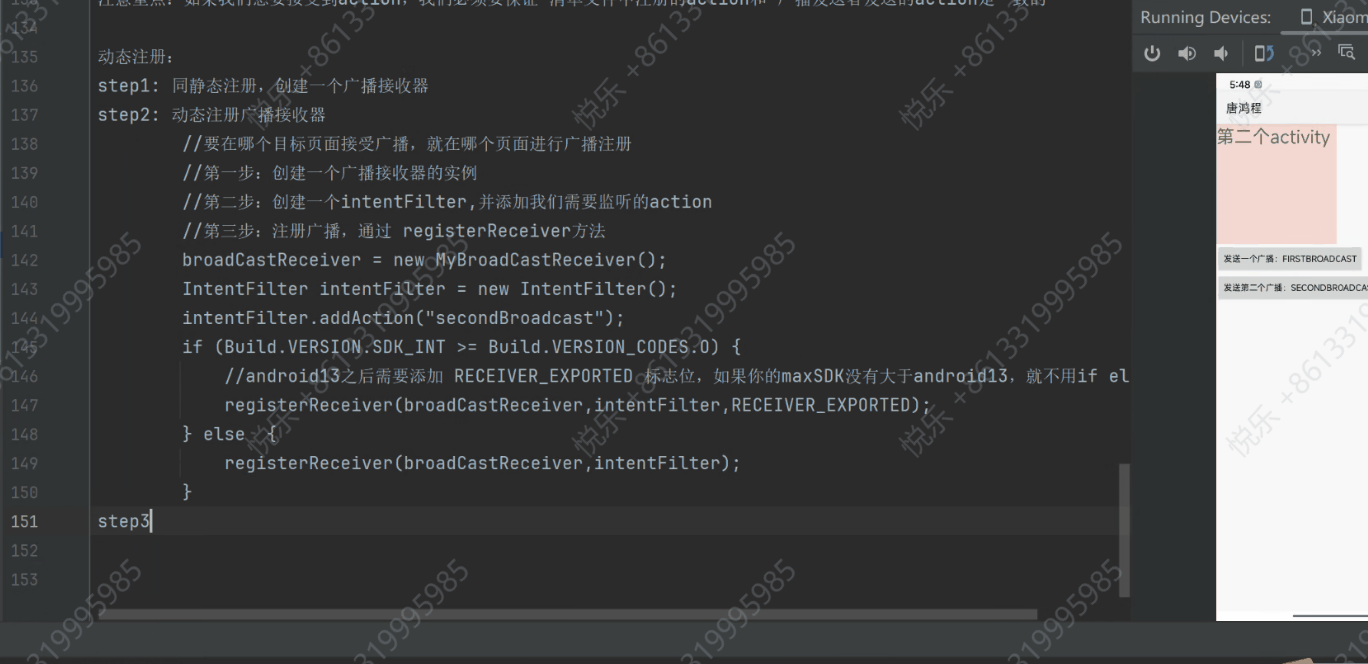
注册方式:
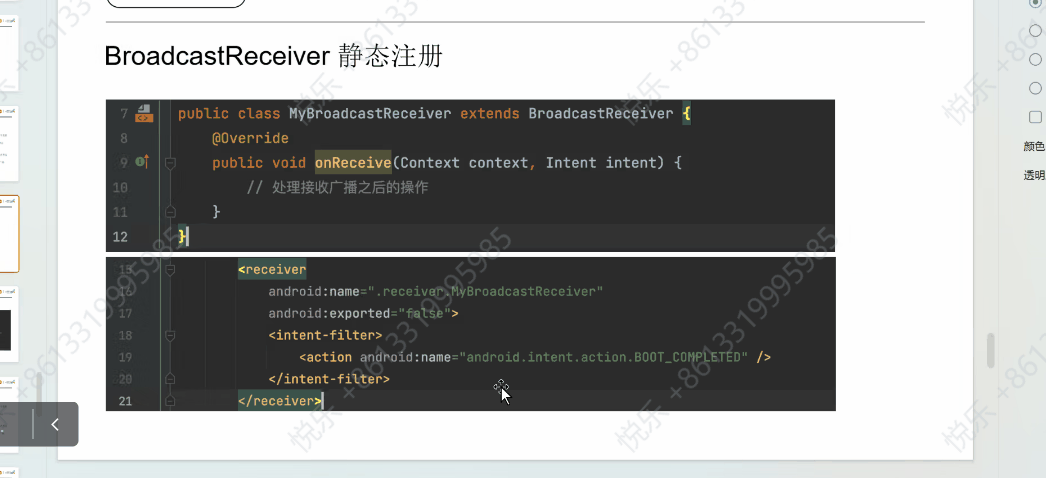
1. 静态注册
step1:创建一个广播接收器 ,继承自BroadcastReceiver(不能内部类)
step2:在清单文件中进行声明
<!-- 清单文件中 声明静态注册广播-->
<receiver android:name=".MyBroadcastReceiver"
android:exported="true">
<intent-filter>
<!-- action可以开发者自己指定-->
<action android:name="myFirstBroadcast"/>
</intent-filter>
</receiver>
step3:可以自己发送广播(可选)
//发送广播
Intent intent = new Intent();
intent.setAction("myFirstBroadcast");
//发送广播一定要指定包名
intent.setPackage(getPackageName());
sendBroadcast(intent);
step4:接收并处理广播, 是在第一步自定义创建的广播接收器的onReceive方法中,处理广播,可以通过intent来获取对应的action
@Override
public void onReceive(Context context, Intent intent) {
//获取action,后续可以根据action的不同,做逻辑区分处理
String action = intent.getAction();
switch (action){
case "myFirstBroadcast":
Toast.makeText(context,"第一个广播:" +action,Toast.LENGTH_SHORT).show();
break;
case "secondBroadcast":
Toast.makeText(context,"第二个广播:" +action,Toast.LENGTH_SHORT).show();
break;
}
Log.d("lollipop","llll:" + action);
}
注意重点:如果我们想要接受到action,我们必须要保证 清单文件中注册的action和 广播发送者发送的action是一致的