Android(2)
Activity的启动和结束
从当前页面跳转到新页面,跳转代码如下:
startActivity(new Intent(源页面.this, 目标页面.class))
从当前页面回到上一个页面,相当于关闭当前页面,返回代码如下:
finish();//结束当前的活动页面
Activity声明周期
onCreate:创建活动。把页面布局加载进内存,进入了初始状态。onStart:开始活动。把活动显示在屏幕上,进入了就绪状态onResume:恢复活动。活动页面进入了活跃状态,能够与用户正常交互,例如允许响应用户的点击动作,允许用户输入文字等等。动画开启onPause:暂停活动。页面进入暂停状态,无法与用户正常交互。动画暂停onStop:停止活动。页面不在屏幕上显示。onDestroy:销毁活动。回收活动占用的系统资源,把页面从内存中清除。onRestart:重启活动。重新加载内存中的页面数据。onNewIntent:重用已有的活动实例
Activity的启动模式
| launchMode属性值 | 说明 |
|---|---|
| standard | 标准模式,无论何时启动哪个活动,都是重新创建该页面的实例并放入栈顶。如果不指定launchMode属性,则默认为标准模式 |
| singleTop | 启动新活动时,判断如果栈顶正好就是该活动的实例,则重用该实例;否则创建新的实例并放入栈顶,也就是按照standard模式处理 |
| singleTask | 启动新活动时,判断如果栈中存在该活动的实例,则重用该实例,启动新活动时,判断如果栈中存在该活动的实例,则重用该实例,并清除位于该实例上面的所有实例;否则按照standard模式处理 |
| singleInstance | 启动新活动时,将该活动的实例放入一个新栈中,原栈的实例列表保持不变 |
启动标志的取值说明如下:
-
Intent.FLAG_ACTIVITY_NEW_TASK:开辟一个新的任务栈 -
Intent.FLAG_ACTIVITY_SINGLE_TOP:当栈顶为待跳转的活动实例之时,则重用栈顶的实例 -
Intent.FLAG_ACTIVITY_CLEAR_TOP:当栈中存在待跳转的活动实例时,则重新创建一个新实例,并清除原实例上方的所有实例 -
Intent.FLAG_ACTIVITY_NO_HISTORY:栈中不保存新启动的活动实例 -
Intent.FLAG_ACTIVITY_CLEAR_TASK:跳转到新页面时,栈中的原有实例都被清空
显示Intent和隐式Intent
Intent是各个组件之间信息沟通的桥梁,它用于Android各组件之间的通信,主要完成下列工作:
- 标明本次通信请求从哪里来,到哪里去,要怎么走。
- 发起方携带本次通信需要的数据内容,接收方从收到的意图中解析数据
- 发起方若想判断接收方的处理结果,意图就要负责让接收方传回应答的数据内容
显示Intent
显示Intent,直接指定来源活动与目标活动,属于精确匹配。三种构建方式:
- 在Intent的构造函数中指定
- 调用意图对象的
setClass方法指定 - 调用意图对象的
setComponent方法指定
    @Override
    public void onClick(View v) {
//        startActivity(new Intent(this, ActFinishActivity.class));
//        Intent intent = new Intent();
//        intent.setClass(this, ActFinishActivity.class)
//        startActivity(intent);
        Intent intent = new Intent();
        ComponentName componentName = new ComponentName(this, ActFinishActivity.class);
        intent.setComponent(componentName);
        Log.d(TAG, "ActStartActivity onClick");
    }
隐式Intent
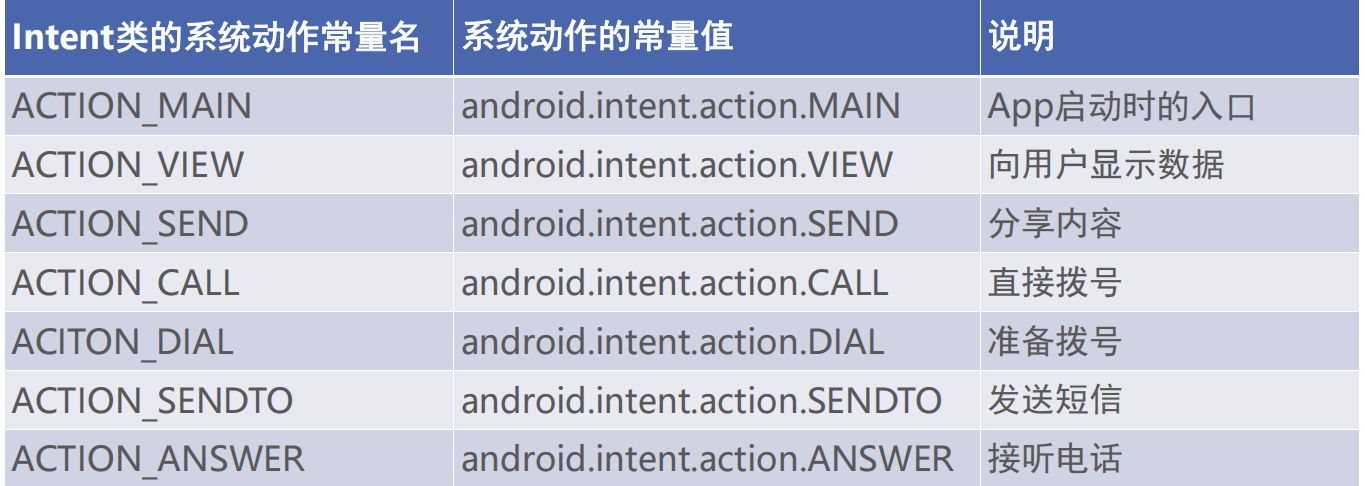
没有明确指定要跳转的目标活动,只给出一个动作字符串让系统自动匹配。属于模糊匹配。动作名称既可以通过setAction方法指定,也可以通过构造函数Intent(String action)直接生成意图对象。常用的系统动作如下表:
AndroidManifest.xml
指定一个需要自定义跳转的View, 将<action> 和 <category>两个标签分别修改为,自定义包名,以及android.intent.category.DEFAULT
        <activity
            android:name=".LoginInputActivity"
            android:exported="true">
            <intent-filter>
                <action android:name="android.intent.action.kennem" />
                <category android:name="android.intent.category.DEFAULT" />
            </intent-filter>
         </activity>
XML
<?xml version="1.0" encoding="utf-8"?>
<LinearLayout xmlns:android="http://schemas.android.com/apk/res/android"
android:id="@+id/main"
android:layout_width="match_parent"
android:layout_height="match_parent"
android:orientation="vertical">
<TextView
android:layout_width="match_parent"
android:layout_height="wrap_content"
android:padding="5dp"
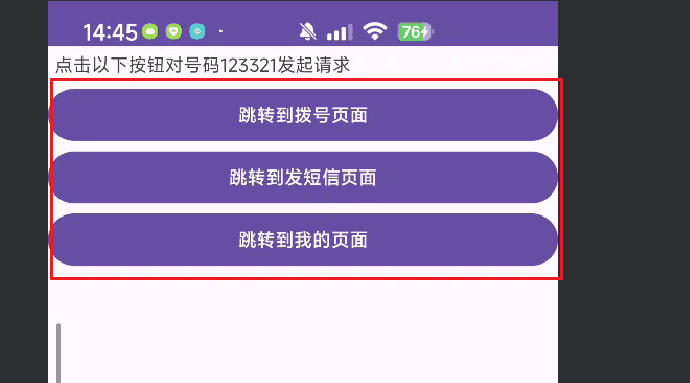
android:text="点击以下按钮对号码123321发起请求"/>
<Button
android:id="@+id/btn_dial"
android:layout_width="match_parent"
android:layout_height="wrap_content"
android:text="跳转到拨号页面"/>
<Button
android:id="@+id/btn_sms"
android:layout_width="match_parent"
android:layout_height="wrap_content"
android:text="跳转到发短信页面"/>
<Button
android:id="@+id/btn_my"
android:layout_width="match_parent"
android:layout_height="wrap_content"
android:text="跳转到我的页面"/>
</LinearLayout>
Java
// 定义一个名为 ActUriActivity 的 Activity 类,继承自 AppCompatActivity 并实现 View.OnClickListener 接口
public class ActUriActivity extends AppCompatActivity implements View.OnClickListener {

    @Override
    protected void onCreate(Bundle savedInstanceState) {
        super.onCreate(savedInstanceState);
        // 设置 Activity 的布局文件
        setContentView(R.layout.activity_act_uri);

        // 为三个按钮设置点击监听器
        findViewById(R.id.btn_dial).setOnClickListener(this);
        findViewById(R.id.btn_sms).setOnClickListener(this);
        findViewById(R.id.btn_my).setOnClickListener(this);
    }

    @Override
    public void onClick(View v) {
        // 创建一个 Intent 对象,用于启动其他 Activity
        Intent intent = new Intent();
        // 定义一个电话号码字符串
        String phoneNum = "123654789";

        // 根据点击的按钮 ID 执行相应的操作
        if (v.getId() == R.id.btn_dial) {
            // 设置 Intent 的 Action 为拨号
            intent.setAction(Intent.ACTION_DIAL);
            // 创建一个 Uri 对象,表示电话号码
            Uri uri = Uri.parse("tel:" + phoneNum);
            // 将 Uri 数据设置到 Intent 中
            intent.setData(uri);
            // 启动拨号界面
            startActivity(intent);
        } else if (v.getId() == R.id.btn_sms) {
            // 设置 Intent 的 Action 为发送短信
            intent.setAction(Intent.ACTION_SENDTO);
            // 创建一个 Uri 对象,表示短信号码
            Uri uri2 = Uri.parse("smsto:" + phoneNum);
            // 将 Uri 数据设置到 Intent 中
            intent.setData(uri2);
            // 启动短信界面
            startActivity(intent);
        } else if (v.getId() == R.id.btn_my) {
            // 设置 Intent 的 Action 为自定义 Action
            intent.setAction("android.intent.action.kennem");
            // 添加默认类别
            intent.addCategory(Intent.CATEGORY_DEFAULT);
            // 启动自定义的 Activity
            startActivity(intent);
        }
    }
}
向下一个Activity发送数据
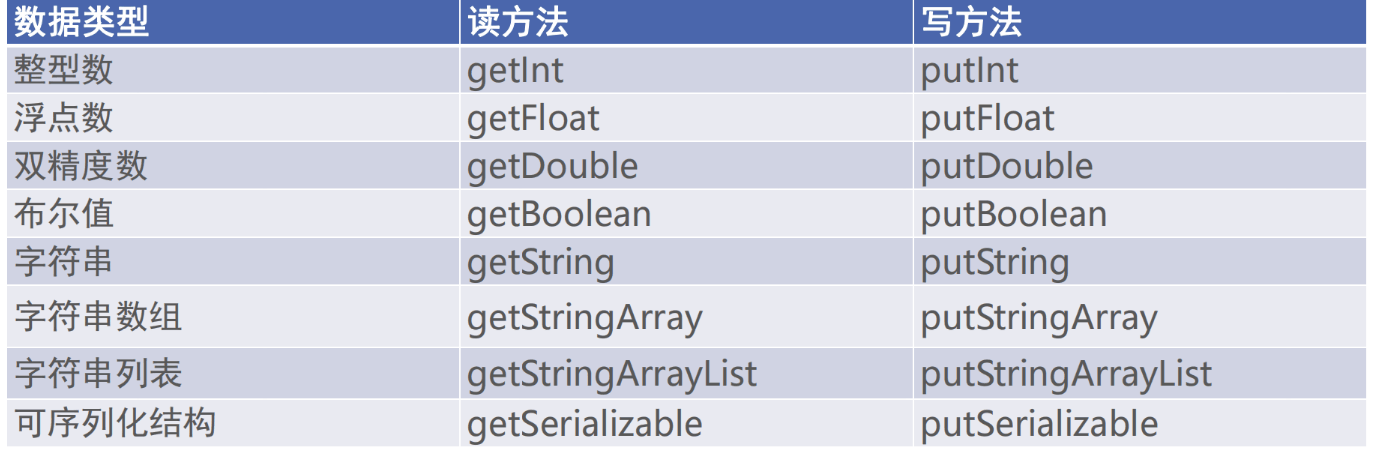
Intent使用Bundle对象存放待传递的数据信息。Bundle对象操作各种类型数据的读写方法说明:
向下一个Activity发送数据
XML
send.xml
<?xml version="1.0" encoding="utf-8"?>
<LinearLayout xmlns:android="http://schemas.android.com/apk/res/android"
    android:id="@+id/main"
    android:layout_width="match_parent"
    android:layout_height="match_parent"
    android:orientation="vertical">

    <TextView
        android:id="@+id/tv_send"
        android:layout_width="match_parent"
        android:layout_height="wrap_content"
        android:text="坚持下去"
        android:textSize="20sp"/>

    <Button
        android:id="@+id/btn_send"
        android:layout_width="match_parent"
        android:layout_height="wrap_content"
        android:gravity="center"
        android:text="发送以上的文字"
        />


</LinearLayout>
receive.xml
<?xml version="1.0" encoding="utf-8"?>
<LinearLayout xmlns:android="http://schemas.android.com/apk/res/android"
    android:id="@+id/main"
    android:layout_width="match_parent"
    android:layout_height="match_parent"
    android:orientation="vertical">

    <TextView
        android:id="@+id/tv_receive"
        android:layout_width="match_parent"
        android:layout_height="wrap_content"
        android:text="坚持下去"
        android:textSize="20sp"/>

</LinearLayout>
Java
ActSentActivity.java
package com.showguan.chapter04;

public class ActSentActivity extends AppCompatActivity implements View.OnClickListener {
    private TextView tv_send;

    @Override
    protected void onCreate(Bundle savedInstanceState) {
        super.onCreate(savedInstanceState);
        setContentView(R.layout.activity_act_sent);
        tv_send = findViewById(R.id.tv_send);
        findViewById(R.id.btn_send).setOnClickListener(this);
    }

    @Override
    public void onClick(View v) {
        Intent intent = new Intent(this, ActReceiveActivity.class);
        Bundle bundle = new Bundle();
        bundle.putString("request_time", DateUtil.getNowTime());
        bundle.putString("request_content", tv_send.getText().toString());
        intent.putExtras(bundle);
        startActivity(intent);
    }

}
ActReceiveActivity.java
package com.showguan.chapter04;

public class ActReceiveActivity extends AppCompatActivity {

    private TextView tv_send;
    private TextView tv_receive;

    @Override
    protected void onCreate(Bundle savedInstanceState) {
        super.onCreate(savedInstanceState);
        setContentView(R.layout.activity_act_receive);
        tv_receive = findViewById(R.id.tv_receive);

        Bundle bundle = getIntent().getExtras();
        String request_time = bundle.getString("request_time");
        String request_content = bundle.getString("request_content");
        String desc = String.format("成功收到消息,收到时间为%s, 收到内容为%s", request_time, request_content);
        tv_receive.setText(desc);
    }
}
向上一个Activity返回数据
XML
request.xml
<?xml version="1.0" encoding="utf-8"?>
<LinearLayout xmlns:android="http://schemas.android.com/apk/res/android"
    android:id="@+id/main"
    android:layout_width="match_parent"
    android:layout_height="match_parent"
    android:orientation="vertical">

    <TextView
        android:id="@+id/tv_request"
        android:layout_margin="30dp"
        android:layout_width="match_parent"
        android:textSize="15sp"
        android:layout_height="wrap_content" />

    <Button
        android:id="@+id/btn_request"
        android:layout_width="match_parent"
        android:layout_height="wrap_content"
        android:layout_margin="30dp"
        android:gravity="center"
        android:text="请求传送数据" />

    <TextView
        android:id="@+id/tv_response"
        android:layout_margin="30dp"
        android:layout_width="match_parent"
        android:layout_height="wrap_content"/>
</LinearLayout>
response.xml
<?xml version="1.0" encoding="utf-8"?>
<LinearLayout xmlns:android="http://schemas.android.com/apk/res/android"
    xmlns:app="http://schemas.android.com/apk/res-auto"
    xmlns:tools="http://schemas.android.com/tools"
    android:id="@+id/main"
    android:layout_width="match_parent"
    android:layout_height="match_parent"
    android:orientation="vertical">

    <TextView
        android:id="@+id/tv_request"
        android:layout_width="match_parent"
        android:layout_height="wrap_content" />

    <Button
        android:id="@+id/btn_response"
        android:layout_width="match_parent"
        android:layout_height="wrap_content"
        android:gravity="center"
        android:text="请求传送数据" />

    <TextView
        android:id="@+id/tv_response"
        android:layout_width="match_parent"
        android:layout_height="wrap_content"/>

</LinearLayout>
Java
ActRequestActivity.java
package com.showguan.chapter04;

public class ActRequestActivity extends AppCompatActivity implements View.OnClickListener {
    // 要发送的请求内容
    private final String mRequest = "今天是2024/06/18, 坚持就是胜利,效率就是王者";
    // 用于启动活动并接收结果的启动器
    private ActivityResultLauncher<Intent> register;
    // 显示响应内容的TextView
    private TextView tv_response;
    // 显示请求内容的TextView
    private TextView tv_request;

    @Override
    protected void onCreate(Bundle savedInstanceState) {
        super.onCreate(savedInstanceState);
        // 设置活动的布局
        setContentView(R.layout.activity_act_request);
        // 绑定显示请求内容的TextView
        tv_request = findViewById(R.id.tv_request);
        // 绑定显示响应内容的TextView
        tv_response = findViewById(R.id.tv_response);

        // 设置待发送的文本内容
        tv_request.setText("待发送的文本:" + mRequest);
        // 绑定按钮点击事件
        findViewById(R.id.btn_request).setOnClickListener(this);

        // 注册一个用于启动活动并接收结果的启动器
        register = registerForActivityResult(new ActivityResultContracts.StartActivityForResult(), result -> {
            if (result != null) {
                // 获取返回的Intent
                Intent intent = result.getData();
                if (intent != null && result.getResultCode() == Activity.RESULT_OK) {
                    // 获取Intent中的数据
                    Bundle bundle = intent.getExtras();
                    String request_time = bundle.getString("response_time");
                    String request_content = bundle.getString("response_content");
                    // 格式化显示响应消息
                    String desc = String.format("收到应答消息,应答时间为%s, 应答内容为%s", request_time, request_content);
                    tv_response.setText(desc);
                }
            }
        });
    }

    @Override
    public void onClick(View v) {
        // 创建一个启动ActResponseActivity的Intent
        Intent intent = new Intent(this, ActResponseActivity.class);

        // 创建一个Bundle用于传递请求数据
        Bundle bundle = new Bundle();
        // 将当前时间和请求内容放入Bundle
        bundle.putString("request_time", DateUtil.getNowTime());
        bundle.putString("request_content", mRequest);
        // 将Bundle放入Intent
        intent.putExtras(bundle);

        // 启动活动并等待结果
        register.launch(intent);
    }
}
ActResponseActivity.java
package com.showguan.chapter04;

public class ActResponseActivity extends AppCompatActivity implements View.OnClickListener {
    // 静态常量,表示响应的内容
    private static final String mResponse = "我™一定能进小米";

    @Override
    protected void onCreate(Bundle savedInstanceState) {
        super.onCreate(savedInstanceState);
        // 设置活动的布局
        setContentView(R.layout.activity_act_response);
        // 绑定显示请求内容的TextView
        TextView tv_request = findViewById(R.id.tv_request);

        // 获取启动此活动时传递的Intent中的Extras
        Bundle bundle = getIntent().getExtras();
        // 从Extras中获取请求的时间和内容
        String request_time = bundle.getString("request_time");
        String request_content = bundle.getString("request_content");
        // 格式化显示接收到的请求消息
        String desc = String.format("成功收到消息,收到时间为%s, 收到内容为%s", request_time, request_content);
        tv_request.setText(desc);

        // 绑定响应按钮的点击事件
        findViewById(R.id.btn_response).setOnClickListener(this);

        // 绑定显示响应内容的TextView
        TextView tv_response = findViewById(R.id.tv_response);
        // 设置待返回的响应内容
        tv_response.setText("待返回的内容:" + mResponse);
    }

    @Override
    public void onClick(View v) {
        // 创建一个返回给ActRequestActivity的Intent
        Intent intent = new Intent(this, ActRequestActivity.class);
        // 创建一个Bundle用于传递响应数据
        Bundle bundle = new Bundle();
        // 将当前时间和响应内容放入Bundle
        bundle.putString("response_time", DateUtil.getNowTime());
        bundle.putString("response_content", "应答内容:" + mResponse);
        // 将Bundle放入Intent
        intent.putExtras(bundle);
        // 设置结果码和返回的Intent
        setResult(Activity.RESULT_OK, intent);
        // 结束当前活动
        finish();
    }
}
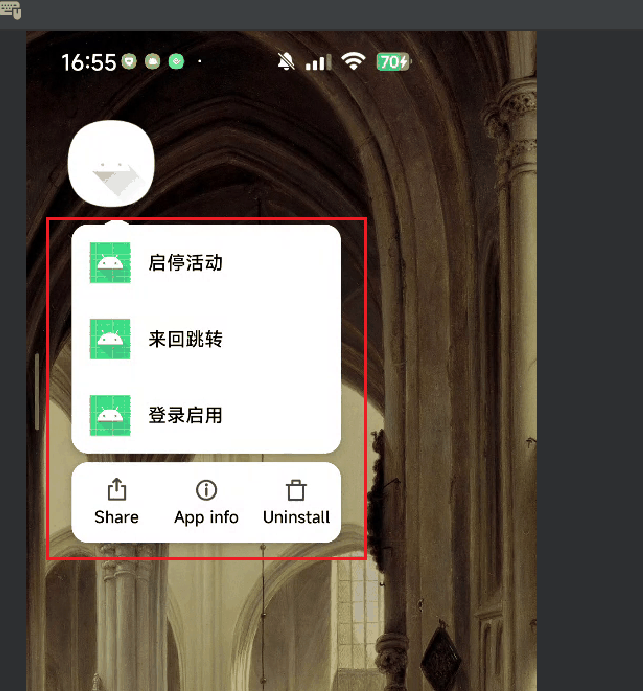
为活动补充附加信息
将string信息定义在strings.xml
<resources>
    <string name="app_name">chapter04</string>
    <string name="weather_info">今天是个糟糕的一天</string>
</resources>
java代码中引用即可:
        TextView tv_resource =  findViewById(R.id.tv_resource);
        String value = getString(R.string.weather_info);
        tv_resource.setText(value);
在代码中获取元数据
- 在
AndroidManifest.xml文件中指定metadata
        <activity
            android:name=".ActStartActivity"
            android:exported="true"
            android:launchMode="standard">
            <intent-filter>
                <action android:name="android.intent.action.MAIN" />
                <category android:name="android.intent.category.LAUNCHER" />
            </intent-filter>

            <meta-data
                android:name="android.app.shortcuts"
                android:resource="@xml/shortcuts" />
        </activity>
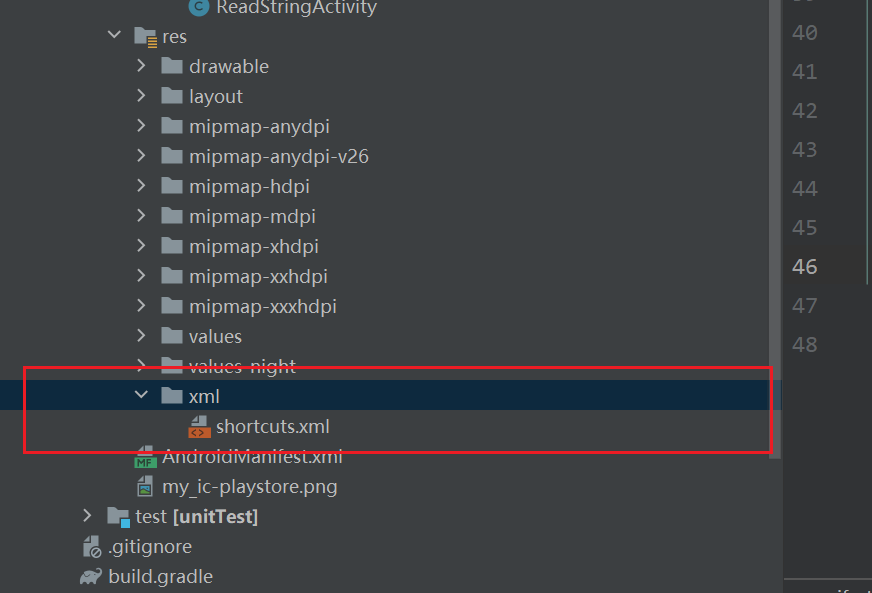
- 编写
shortcuts.xml, 指定显示的名称和要跳转的页面
<?xml version="1.0" encoding="utf-8"?>

<shortcuts xmlns:android="http://schemas.android.com/apk/res/android">

    <shortcut
        android:enabled="true"
        android:icon="@mipmap/ic_launcher"
        android:shortcutId="first"
        android:shortcutLongLabel="@string/first_long"
        android:shortcutShortLabel="@string/first_short">

        <intent
            android:action="android.intent.action.VIEW"
            android:targetClass="com.showguan.chapter04.ActStartActivity"
            android:targetPackage="com.showguan.chapter04">
            <categories android:name="android.shortcut.conversation" />
        </intent>
    </shortcut>

    <shortcut
        android:enabled="true"
        android:icon="@mipmap/ic_launcher"
        android:shortcutId="second"
        android:shortcutLongLabel="@string/second_long"
        android:shortcutShortLabel="@string/second_short">

        <intent
            android:action="android.intent.action.VIEW"
            android:targetClass="com.showguan.chapter04.JumpFirstActivity"
            android:targetPackage="com.showguan.chapter04">
            <categories android:name="android.shortcut.conversation" />
        </intent>
    </shortcut>

    <shortcut
        android:enabled="true"
        android:icon="@mipmap/ic_launcher"
        android:shortcutId="third"
        android:shortcutLongLabel="@string/third_long"
        android:shortcutShortLabel="@string/third_short">

        <intent
            android:action="android.intent.action.VIEW"
            android:targetClass="com.showguan.chapter04.LoginInputActivity"
            android:targetPackage="com.showguan.chapter04">
            <categories android:name="android.shortcut.conversation" />
        </intent>
    </shortcut>

</shortcuts>
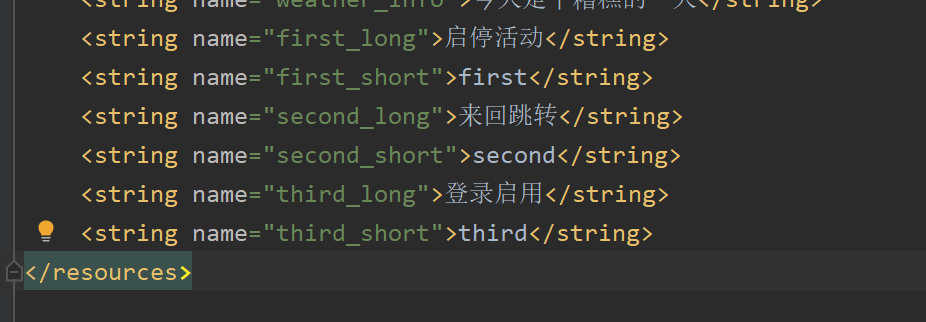
注意名称需要存储在strings.xml中
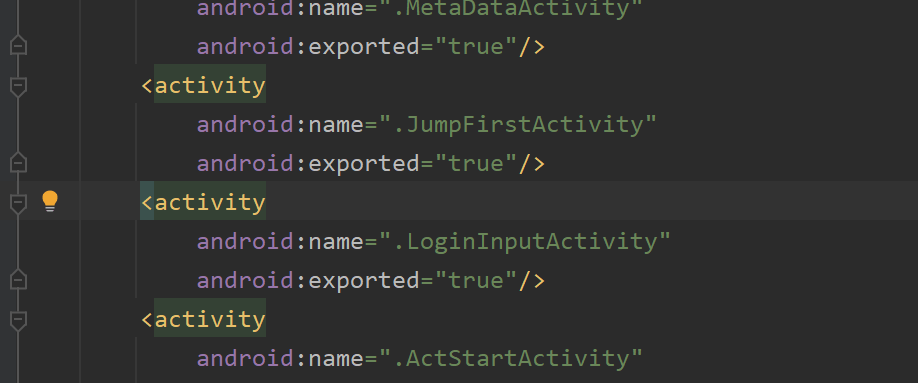
AndroidManifest.xml中需要跳转的页面exported属性要设置为true
中级控件
图形Drawable
-
Drawable类型表达了各种各样的图形,包括图片,色块,画板, 背景等
-
包含图片在内的图形文件放在res目录的各个drawable目录下,其中drawable目录一般保存描述性的XML文件,而图片文件一般放在具体分辨率的drawable目录下。
-
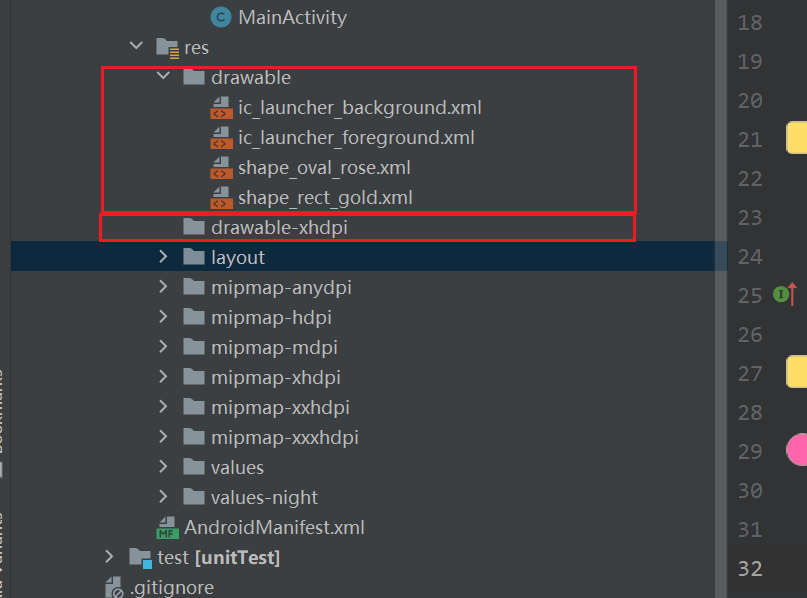
drawable-ldpi,drawable-mdpi,drawable-hdpi,drawable-xhdpi,drawable-xxhdpi,drawable-xxhdpi表示低分辨率,中等分辨率,高分辨率,超高分辨率, 超超高分辨率
-
各视图的
background属性,ImageView和ImageButton的src属性,TextView和Button四个方向的drawable系列属性都可以引用图形文件。
形状图形
shape图形又称形状图形,它用来描述常见的几何形状,包括矩形,圆角矩形,圆形,椭圆等。- 形状图形
drawable中xml
<?xml version="1.0" encoding="utf-8"?>
<shape xmlns:android="http://schemas.android.com/apk/res/android"
    android:shape="oval">

    <solid
        android:color="#ff66aa"/>
    <stroke
        android:width="1dp"
        android:color="#aaaaaa"/>

</shape>
<?xml version="1.0" encoding="utf-8"?>
<shape xmlns:android="http://schemas.android.com/apk/res/android">

<!--    填充颜色-->
    <solid android:color="#ffdd66" />
<!--    轮廓粗细与颜色-->
    <stroke
        android:width="1dp"
        android:color="#aaaaaa" />
<!--    形状四个圆角的半径-->
    <corners android:radius="10dp" />
</shape>
activity_draw_shape.xml
<?xml version="1.0" encoding="utf-8"?>
<LinearLayout xmlns:android="http://schemas.android.com/apk/res/android"
    android:id="@+id/main"
    android:layout_width="match_parent"
    android:layout_height="match_parent"
    android:orientation="vertical">

    <View
        android:id="@+id/v_content"
        android:layout_width="match_parent"
        android:layout_height="200dp"
        android:layout_margin="10dp"/>

    <LinearLayout
        android:layout_width="match_parent"
        android:layout_height="wrap_content"
        android:orientation="horizontal">

        <Button
            android:id="@+id/btn_rect"
            android:layout_width="0dp"
            android:layout_height="wrap_content"
            android:layout_weight="1"
            android:text="圆角矩形按钮"/>

        <Button
            android:id="@+id/btn_oval"
            android:layout_width="0dp"
            android:layout_height="wrap_content"
            android:layout_weight="1"
            android:text="椭圆按钮"/>
    </LinearLayout>
</LinearLayout>
Java
package com.showguan.chapter05;

public class DrawShapeActivity extends AppCompatActivity implements View.OnClickListener {
    private View v_content;
    @Override
    protected void onCreate(Bundle savedInstanceState) {
        super.onCreate(savedInstanceState);
        setContentView(R.layout.activity_draw_shape);
        v_content = findViewById(R.id.v_content);
        findViewById(R.id.btn_rect).setOnClickListener(this);
        findViewById(R.id.btn_oval).setOnClickListener(this);
        v_content.setBackgroundResource(R.drawable.shape_rect_gold);
    }

    @Override
    public void onClick(View v) {
        if(v.getId() == R.id.btn_rect){
            v_content.setBackgroundResource(R.drawable.shape_rect_gold);
        }else if (v.getId()==R.id.btn_oval){
            v_content.setBackgroundResource(R.drawable.shape_oval_rose);
        }
    }
}
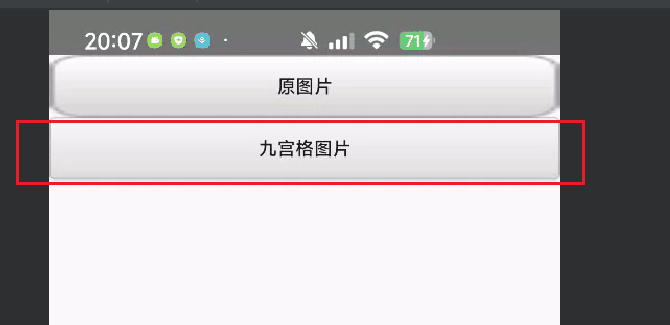
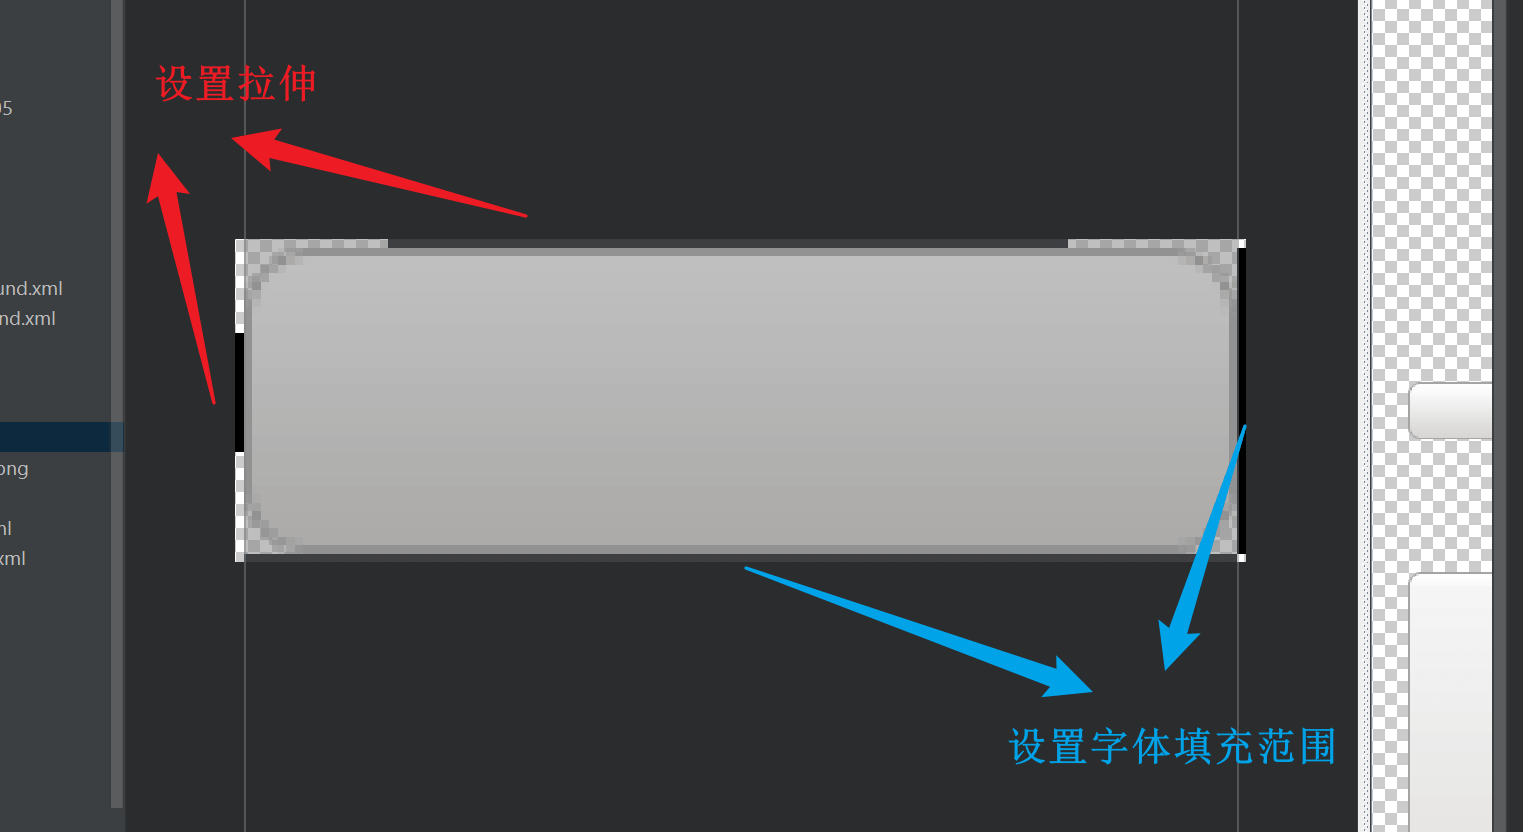
九宫格图片
- 将某张图片设置为视图背景时,如果图片尺寸太小,则系统会自动拉伸图片使之填满背景
- 可是一旦图片拉得过大,其画面容易变得模糊
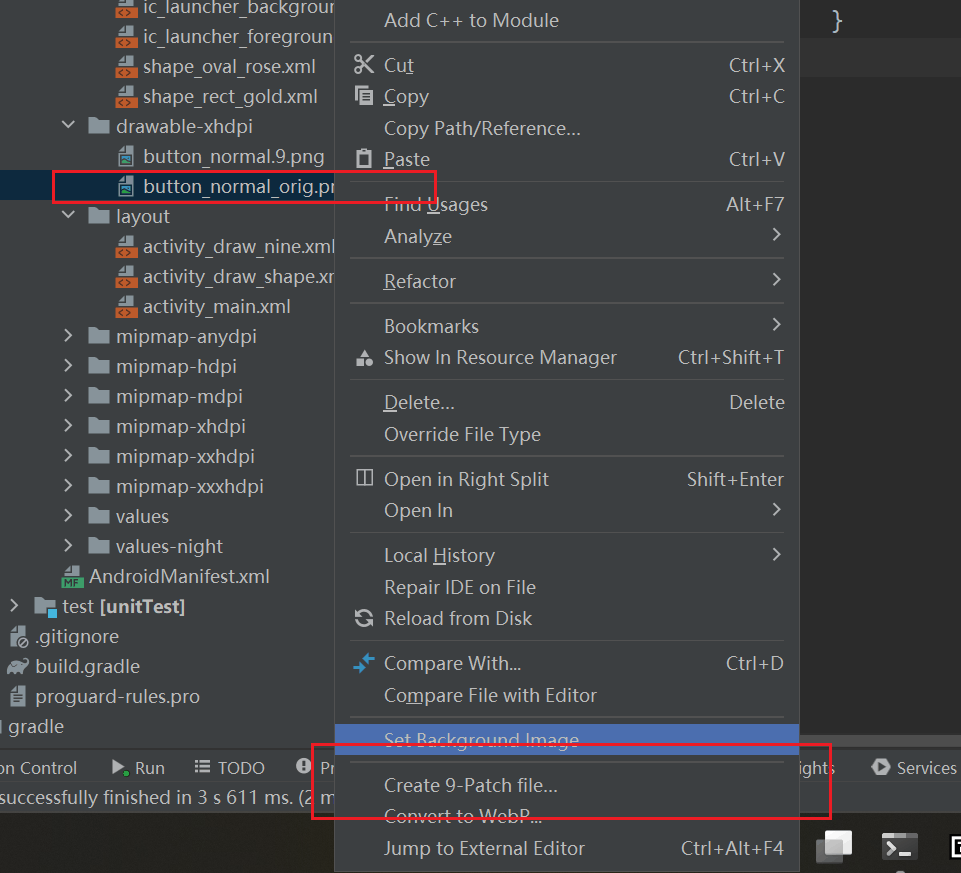
创建.9文件
状态列表图形

btn_nice_selector.xml
<?xml version="1.0" encoding="utf-8"?>
<selector xmlns:android="http://schemas.android.com/apk/res/android">
    <item android:state_pressed="true" android:drawable="@drawable/button_pressed"
        />
    <item android:drawable="@drawable/button_normal" />
</selector>
复选框checkbox
xml
<?xml version="1.0" encoding="utf-8"?>
<LinearLayout xmlns:android="http://schemas.android.com/apk/res/android"
    android:id="@+id/main"
    android:layout_width="match_parent"
    android:layout_height="match_parent"
    android:orientation="vertical">

    <CheckBox
        android:id="@+id/ck_system"
        android:layout_width="match_parent"
        android:layout_height="wrap_content"
        android:layout_marginTop="5dp"
        android:text="系统的checkbox"/>

    <CheckBox
        android:id="@+id/ck_custom"
        android:layout_width="match_parent"
        android:layout_height="wrap_content"
        android:button="@drawable/checkbox_selector"
        android:layout_marginTop="10dp"
        android:checked="true"
        android:text="系统的checkbox"/>


</LinearLayout>
Java
package com.showguan.chapter05;

import android.os.Bundle;
import android.view.View;
import android.widget.CheckBox;
import android.widget.CompoundButton;

import androidx.activity.EdgeToEdge;
import androidx.appcompat.app.AppCompatActivity;
import androidx.core.graphics.Insets;
import androidx.core.view.ViewCompat;
import androidx.core.view.WindowInsetsCompat;

public class CheckBoxActivity extends AppCompatActivity implements CompoundButton.OnCheckedChangeListener {

    @Override
    protected void onCreate(Bundle savedInstanceState) {
        super.onCreate(savedInstanceState);
        setContentView(R.layout.activity_check_box);
        CheckBox ck_system = findViewById(R.id.ck_system);
        CheckBox ck_custom = findViewById(R.id.ck_custom);
        ck_system.setOnCheckedChangeListener(this);
        ck_custom.setOnCheckedChangeListener(this);
    }

    @Override
    public void onCheckedChanged(CompoundButton buttonView, boolean isChecked) {
        String desc = String.format("您%s此按钮。" , isChecked ? "勾选了" : "取消勾选了");
        buttonView.setText(desc);
    }
}
开关Switch
xml
<?xml version="1.0" encoding="utf-8"?>
<LinearLayout xmlns:android="http://schemas.android.com/apk/res/android"
    android:id="@+id/main"
    android:layout_width="match_parent"
    android:layout_height="match_parent"
    android:orientation="vertical">

    <LinearLayout
        android:layout_width="match_parent"
        android:layout_height="wrap_content"
        android:orientation="horizontal">

        <TextView
            android:layout_width="0dp"
            android:layout_height="wrap_content"
            android:layout_gravity="start"
            android:layout_marginTop="5dp"
            android:layout_weight="1"
            android:text="开关"
            android:textSize="17sp" />

        <Switch
            android:id="@+id/sw_status"
            android:layout_width="wrap_content"
            android:layout_height="wrap_content"
            android:layout_gravity="end"
            android:width="80dp"
            android:height="30dp"
            android:padding="5dp" />

    </LinearLayout>

    <TextView
        android:id="@+id/tv_result"
        android:layout_width="0dp"
        android:layout_height="wrap_content"
        android:layout_gravity="start"
        android:layout_marginTop="10dp"
        android:layout_weight="1"
        android:gravity="start" />

</LinearLayout>
Java
package com.showguan.chapter05;

public class SwitchActivity extends AppCompatActivity implements CompoundButton.OnCheckedChangeListener {

    private TextView tv_result;

    @Override
    protected void onCreate(Bundle savedInstanceState) {
        super.onCreate(savedInstanceState);
        setContentView(R.layout.activity_switch);
        Switch sw_status = findViewById(R.id.sw_status);
        tv_result = findViewById(R.id.tv_result);
        sw_status.setOnCheckedChangeListener(this);

    }

    @Override
    public void onCheckedChanged(CompoundButton buttonView, boolean isChecked) {
        String desc = String.format("Switch按钮的状态是%s", isChecked ? "开" : "关");
        tv_result.setText(desc);
    }
}
用checkbox实现switch

xml
<?xml version="1.0" encoding="utf-8"?>
<LinearLayout xmlns:android="http://schemas.android.com/apk/res/android"
    android:id="@+id/main"
    android:layout_width="match_parent"
    android:layout_height="match_parent"
    android:orientation="vertical">

    <LinearLayout
        android:layout_width="match_parent"
        android:layout_height="wrap_content"
        android:orientation="horizontal">

        <TextView
            android:layout_width="0dp"
            android:layout_height="wrap_content"
            android:layout_gravity="start"
            android:layout_marginTop="5dp"
            android:layout_weight="1"
            android:text="开关"
            android:textSize="17sp" />

        <CheckBox
            android:id="@+id/ck_status"
            android:layout_width="60dp"
            android:layout_height="30dp"
            android:layout_gravity="end"
            android:width="80dp"
            android:height="30dp"
            android:background="@drawable/switch_selector"
            android:button="@null" />

    </LinearLayout>

    <TextView
        android:id="@+id/tv_result"
        android:layout_width="match_parent"
        android:layout_height="wrap_content"
        android:layout_gravity="start"
        android:layout_marginTop="10dp"
        android:gravity="start" />

</LinearLayout>
Java
package com.showguan.chapter05;

public class SwitchIOSActivity extends AppCompatActivity implements CompoundButton.OnCheckedChangeListener {
    private TextView tv_result;

    @Override
    protected void onCreate(Bundle savedInstanceState) {
        super.onCreate(savedInstanceState);
        setContentView(R.layout.activity_switch_iosactivity);
        CheckBox ck_status = findViewById(R.id.ck_status);
        tv_result = findViewById(R.id.tv_result);
        ck_status.setOnCheckedChangeListener(this);
    }


    @Override
    public void onCheckedChanged(CompoundButton buttonView, boolean isChecked) {
        String desc = String.format("开关按钮的状态是%s", isChecked ? "开" : "关");
        tv_result.setText(desc);
    }
}
单选按钮RadioButton
XML
<?xml version="1.0" encoding="utf-8"?>
<LinearLayout xmlns:android="http://schemas.android.com/apk/res/android"
    android:id="@+id/main"
    android:layout_width="match_parent"
    android:layout_height="match_parent"
    android:orientation="vertical">

    <TextView
        android:layout_width="match_parent"
        android:layout_height="wrap_content"
        android:layout_gravity="start"
        android:layout_marginTop="5dp"
        android:text="请选择你的性别"
        android:textSize="17sp" />

    <RadioGroup
        android:id="@+id/rg_gender"
        android:layout_width="match_parent"
        android:layout_height="wrap_content"
        android:orientation="horizontal">

        <RadioButton
            android:id="@+id/rb_male"
            android:layout_width="0dp"
            android:layout_height="wrap_content"
            android:layout_weight="1"
            android:text="男" />

        <RadioButton
            android:id="@+id/rb_female"
            android:layout_width="0dp"
            android:layout_height="wrap_content"
            android:layout_weight="1"
            android:text="女" />

    </RadioGroup>

    <TextView
        android:id="@+id/tv_result"
        android:layout_width="match_parent"
        android:layout_height="wrap_content"
        android:layout_marginTop="10dp"
        android:textSize="17sp"
        />

</LinearLayout>
Java
package com.showguan.chapter05;

public class RadioHorizontalActivity extends AppCompatActivity implements RadioGroup.OnCheckedChangeListener {

    private TextView tv_result;

    @Override
    protected void onCreate(Bundle savedInstanceState) {
        super.onCreate(savedInstanceState);
        setContentView(R.layout.activity_radio_horizontal);
        RadioGroup rg_gender = findViewById(R.id.rg_gender);
        rg_gender.setOnCheckedChangeListener(this);
        tv_result = findViewById(R.id.tv_result);
    }

    @Override
    public void onCheckedChanged(RadioGroup group, int checkedId) {
        if(checkedId == R.id.rb_male){
            tv_result.setText("你是个帅气的男孩");
        } else if (checkedId==R.id.rb_female) {
            tv_result.setText("你是个漂亮的女孩");
        }
    }
}
EditText设置外框
XML
<?xml version="1.0" encoding="utf-8"?>
<LinearLayout xmlns:android="http://schemas.android.com/apk/res/android"
    android:id="@+id/main"
    android:layout_width="match_parent"
    android:layout_height="match_parent"
    android:orientation="vertical"
    android:padding="5dp">

    <EditText
        android:layout_width="match_parent"
        android:layout_height="wrap_content"
        android:hint="这里是默认边框"
        android:inputType="text"/>

    <EditText
        android:layout_width="match_parent"
        android:layout_height="wrap_content"
        android:hint="这里没有边框"
        android:inputType="text"
        android:layout_marginTop="5dp"
        android:background="@null"/>

    <EditText
        android:layout_width="match_parent"
        android:layout_height="wrap_content"
        android:hint="这里是圆角边框"
        android:inputType="text"
        android:layout_marginTop="5dp"
        android:background="@drawable/edittext_selector"
        />

</LinearLayout>
Java
public class EditBoardActivity extends AppCompatActivity {

    @Override
    protected void onCreate(Bundle savedInstanceState) {
        super.onCreate(savedInstanceState);
        setContentView(R.layout.activity_edit_board);
    }
}
对话提示框
XML
<?xml version="1.0" encoding="utf-8"?>
<LinearLayout xmlns:android="http://schemas.android.com/apk/res/android"
    android:id="@+id/main"
    android:layout_width="match_parent"
    android:layout_height="match_parent"
    android:orientation="vertical"
    android:padding="5dp">

    <Button
        android:id="@+id/btn_alert"
        android:layout_width="match_parent"
        android:layout_height="wrap_content"
        android:hint="这里没有边框"
        android:text="点击弹出提醒对话框"
        android:layout_marginTop="5dp"
        android:background="@null"/>

    <TextView
        android:id="@+id/tv_alert"
        android:layout_width="match_parent"
        android:layout_height="wrap_content"
        android:layout_marginTop="5dp"
        />

</LinearLayout>
Java
package com.showguan.chapter05;

import android.os.Bundle;
import android.view.View;
import android.widget.TextView;

import androidx.appcompat.app.AlertDialog;
import androidx.appcompat.app.AppCompatActivity;

public class AlertDialogActivity extends AppCompatActivity implements View.OnClickListener {

    private TextView tv_alert;

    @Override
    protected void onCreate(Bundle savedInstanceState) {
        super.onCreate(savedInstanceState);
        setContentView(R.layout.activity_alert_dialog);
        findViewById(R.id.btn_alert).setOnClickListener(this);
        tv_alert = findViewById(R.id.tv_alert);
    }

    @Override
    public void onClick(View v) {
        AlertDialog.Builder builder = new AlertDialog.Builder(this);
        builder.setTitle("尊敬的用户朋友");
        builder.setMessage("你真的确定没点错吗?");
        builder.setPositiveButton("残忍卸载", (dialog, which) -> {
            tv_alert.setText("虽然依依不舍,但是希望能再见面");
        });
        builder.setNegativeButton("点错了哦", (dialog, which) -> {
            tv_alert.setText("我还要再陪你365*n个日夜");
        });

        AlertDialog dialog = builder.create();
        dialog.show();
    }
}
文本框提示信息
XML
<?xml version="1.0" encoding="utf-8"?>
<LinearLayout xmlns:android="http://schemas.android.com/apk/res/android"
    android:id="@+id/main"
    android:layout_width="match_parent"
    android:layout_height="match_parent"
    android:orientation="vertical"
    android:padding="5dp">


    <EditText
        android:id="@+id/et_phone"
        android:layout_width="match_parent"
        android:layout_height="wrap_content"
        android:hint="请输入11位手机号码"
        android:inputType="number"
        android:maxLength="11"
        android:layout_marginTop="15dp"
        android:background="@drawable/edittext_selector"/>

    <EditText
        android:id="@+id/et_password"
        android:layout_width="match_parent"
        android:layout_height="wrap_content"
        android:hint="请输入6位密码"
        android:inputType="numberPassword"
        android:maxLength="11"
        android:layout_marginTop="15dp"
        android:background="@drawable/edittext_selector"/>

    <Button
        android:layout_width="match_parent"
        android:layout_marginTop="15dp"
        android:layout_height="wrap_content"
        android:text="登录"/>

</LinearLayout>
Java
package com.showguan.chapter05;

public class EditFocusActivity extends AppCompatActivity implements View.OnFocusChangeListener {

    private EditText et_phone;

    @Override
    protected void onCreate(Bundle savedInstanceState) {
        super.onCreate(savedInstanceState);
        setContentView(R.layout.activity_edit_focus);
        et_phone = findViewById(R.id.et_phone);
        et_phone.setOnFocusChangeListener(this);
    }

    @Override
    public void onFocusChange(View v, boolean hasFocus) {
        if(!hasFocus){
            String phone = et_phone.getText().toString();
            if(TextUtils.isEmpty(phone) || phone.length() < 11){
//                et_phone.requestFocus();
                Toast.makeText(this, "请输入11位手机号码", Toast.LENGTH_SHORT).show();
            }
        }
    }
}
实现当文本长度符合时自动收起输入法
@Override
protected void onCreate(Bundle savedInstanceState) {
    super.onCreate(savedInstanceState);
    setContentView(R.layout.activity_edit_hide); // 设置当前活动的布局

    // 获取布局文件中的EditText控件
    EditText et_phone = findViewById(R.id.et_phone);
    EditText et_password = findViewById(R.id.et_password);

    // 为EditText控件添加文本变化监听器
    et_phone.addTextChangedListener(new HideTextWatcher(et_phone, 11));
    et_password.addTextChangedListener(new HideTextWatcher(et_password, 6));
}

// 自定义的文本监听器类,用于在文本长度达到指定值时隐藏输入法
private class HideTextWatcher implements TextWatcher {
    private EditText mView; // 需要监听的EditText控件
    private int mMaxLength; // 文本长度的最大值

    // 构造函数,初始化控件和最大长度
    public HideTextWatcher(EditText et, int maxLength) {
        this.mView = et;
        this.mMaxLength = maxLength;
    }

    // 文本变化前的回调方法
    @Override
    public void beforeTextChanged(CharSequence s, int start, int count, int after) {
        // 在文本变化前执行的操作,这里不需要实现
    }

    // 文本变化中的回调方法
    @Override
    public void onTextChanged(CharSequence s, int start, int before, int count) {
        // 在文本变化中执行的操作,这里不需要实现
    }

    // 文本变化后的回调方法
    @Override
    public void afterTextChanged(Editable s) {
        String str = s.toString(); // 获取当前文本内容
        if(str.length() == mMaxLength) { // 如果文本长度等于最大值
            // 调用自定义工具类隐藏输入法
            ViewUtil.hideOneInputMethod(EditHideActivity.this, mView);
        }
    }
}
日期选择器 DatePicker
XML
<?xml version="1.0" encoding="utf-8"?>
<LinearLayout xmlns:android="http://schemas.android.com/apk/res/android"
    android:id="@+id/main"
    android:layout_width="match_parent"
    android:layout_height="match_parent"
    android:orientation="vertical"
    >

    <Button
        android:id="@+id/btn_calendar"
        android:layout_width="match_parent"
        android:layout_height="wrap_content"
        android:text="请选择日期"
        android:layout_marginTop="40dp"/>

    <DatePicker
        android:id="@+id/dp_date"
        android:layout_width="match_parent"
        android:layout_height="wrap_content"
        android:datePickerMode="spinner"
        android:calendarViewShown="false"/>

    <Button
        android:id="@+id/btn_confirm"
        android:layout_width="match_parent"
        android:layout_height="wrap_content"
        android:text="确定"/>

    <TextView
        android:id="@+id/tv_result"
        android:layout_width="match_parent"
        android:layout_height="wrap_content"
        android:background="@drawable/edittext_selector"
        />


</LinearLayout>
Java
package com.showguan.chapter05;

import android.app.DatePickerDialog;
import android.os.Bundle;
import android.view.View;
import android.widget.Button;
import android.widget.DatePicker;
import android.widget.TextView;

import androidx.activity.EdgeToEdge;
import androidx.appcompat.app.AppCompatActivity;
import androidx.core.graphics.Insets;
import androidx.core.view.ViewCompat;
import androidx.core.view.WindowInsetsCompat;

public class DatePickerActivity extends AppCompatActivity implements View.OnClickListener, DatePickerDialog.OnDateSetListener {

    private DatePicker dp_date;
    private TextView tv_result;

    @Override
    protected void onCreate(Bundle savedInstanceState) {
        super.onCreate(savedInstanceState);
        EdgeToEdge.enable(this);
        setContentView(R.layout.activity_date_picker);
        findViewById(R.id.btn_confirm).setOnClickListener(this);
        findViewById(R.id.btn_calendar).setOnClickListener(this);
        dp_date = findViewById(R.id.dp_date);
        tv_result = findViewById(R.id.tv_result);
    }

    @Override
    public void onClick(View v) {
        if(v.getId() == R.id.btn_confirm){
            String desc = String.format("您选择的日期为%s年 %s月 %s日", dp_date.getYear(), dp_date.getMonth() + 1, dp_date.getDayOfMonth());
            tv_result.setText(desc);
        } else if (v.getId() == R.id.btn_calendar) {
            DatePickerDialog dialog = new DatePickerDialog(this, this, 2027, 4, 13);
            dialog.show();
        }
    }

    @Override
    public void onDateSet(DatePicker view, int year, int month, int dayOfMonth) {
        String desc = String.format("您选择的日期为%s年 %s月 %s日", year, month, dayOfMonth);
        tv_result.setText(desc);
    }
}
时间选择器 TimePicker
XML
<?xml version="1.0" encoding="utf-8"?>
<LinearLayout xmlns:android="http://schemas.android.com/apk/res/android"
    android:id="@+id/main"
    android:layout_width="match_parent"
    android:layout_height="match_parent"
    android:orientation="vertical"
    >

    <Button
        android:id="@+id/btn_time"
        android:layout_width="match_parent"
        android:layout_height="wrap_content"
        android:text="请选择时间"
        android:layout_marginTop="40dp"/>

    <TimePicker
        android:id="@+id/tp_time"
        android:layout_width="match_parent"
        android:layout_height="wrap_content"
        android:timePickerMode="spinner"
        android:layout_marginTop="5dp"
        android:calendarViewShown="false"/>

    <Button
        android:id="@+id/btn_confirm"
        android:layout_width="match_parent"
        android:layout_height="wrap_content"
        android:text="确定"/>

    <TextView
        android:id="@+id/tv_result"
        android:layout_width="match_parent"
        android:layout_height="wrap_content"
        android:layout_marginTop="5dp"
        android:background="@drawable/edittext_selector"
        />


</LinearLayout>
Java
public class TimePickerActivity extends AppCompatActivity implements View.OnClickListener, TimePickerDialog.OnTimeSetListener {

    private TimePicker tp_time;
    private TextView tv_result;

    @Override
    protected void onCreate(Bundle savedInstanceState) {
        super.onCreate(savedInstanceState);
        setContentView(R.layout.activity_time_picker);
        findViewById(R.id.btn_confirm).setOnClickListener(this);
        findViewById(R.id.btn_time).setOnClickListener(this);
        tp_time = findViewById(R.id.tp_time);
        tv_result = findViewById(R.id.tv_result);
    }

    @Override
    public void onClick(View v) {
        if (v.getId() == R.id.btn_confirm) {
            String desc = String.format("您选择的时间为%s时 %s分", tp_time.getHour(), tp_time.getMinute());
            tv_result.setText(desc);
        } else if (v.getId() == R.id.btn_time) {
            Log.d("Kennem", "onClick: R.id.btn_time");
            Calendar calendar = Calendar.getInstance();
            TimePickerDialog dialog = new TimePickerDialog(this, AlertDialog.THEME_HOLO_DARK,this, calendar.get(Calendar.HOUR_OF_DAY), calendar.get(Calendar.MINUTE), true);
            dialog.show();
        }
    }

    @Override
    public void onTimeSet(TimePicker view, int hourOfDay, int minute) {
        String desc = String.format("您选择的时间为%s时 %s分", hourOfDay, minute);
        tv_result.setText(desc);
    }
}
案例
登录页面以及找回密码页面